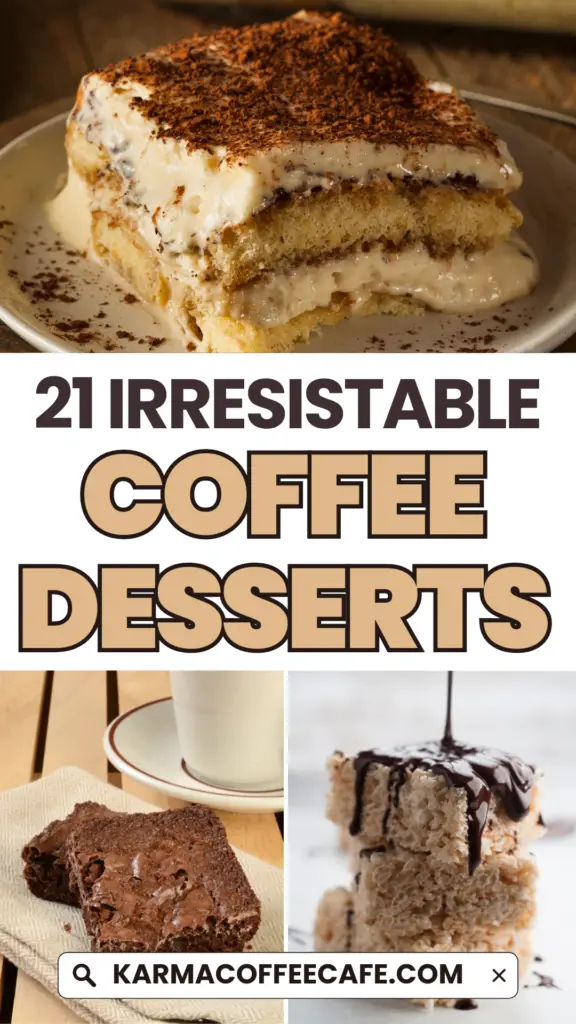
Who doesn’t love a sweet treat with a caffeine kick? Coffee desserts combine the rich, bold flavor of coffee with sweet and decadent ingredients.
From creamy cheesecakes to fudgy brownies, these desserts offer something for everyone.
Here’s a list of 21 diverse and delicious coffee dessert recipes that are sure to impress and satisfy your cravings.
Whether you’re a coffee aficionado or just looking for a new dessert to try, you’re in for a treat!
21 Coffee Dessert Recipes: At A Glance
- Chocolate Cappuccino Cheesecake
- Coffee Brownies
- Mocha Truffles
- Double Chocolate Mocha Trifle
- Whole Wheat Chocolate Coffee Cake
- Caramel Macchiato Ice Cream
- Mocha Meringue Sandwich Cookies
- Fudgy Layered Irish Mocha Brownies
- Quick and Easy Tiramisu
- Salted Caramel Cappuccino Cheesecake
- Mocha Hazelnut Torte
- Morning Buzz Rice Krispies Treats
- Chocolate Espresso-Nut Torte
- Fluffy Coffee Cupcakes
- Mocha Chip Blondies with Coffee Glaze
- Tiramisu Cupcakes
- Nutella Coffee Ice Cream
- No-Churn Coffee Ice Cream
- Dulce de Leche Mocha Cupcakes
- Coffee Ice Cream Cake
- Coffee Panna Cotta
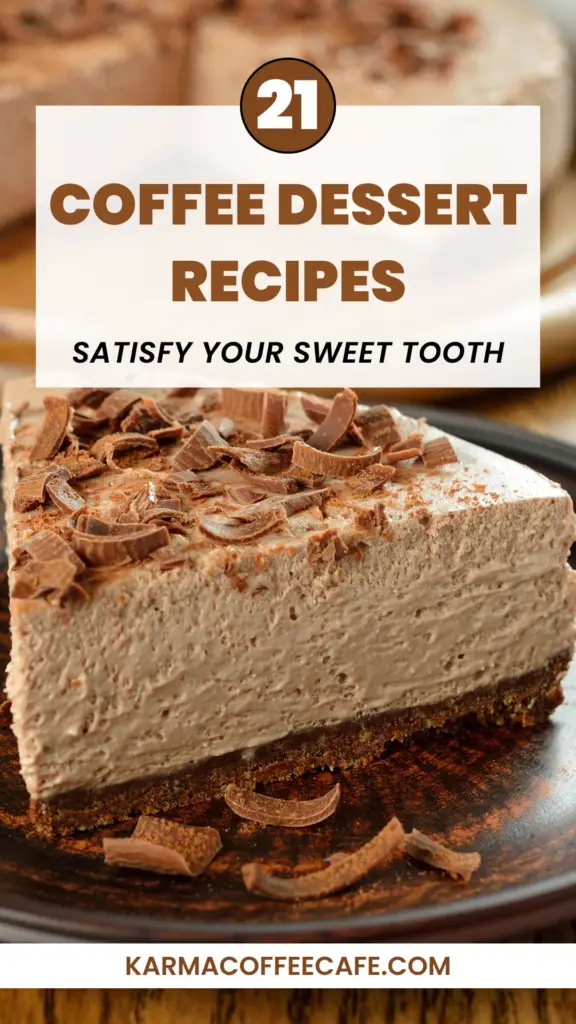
1. Chocolate Cappuccino Cheesecake
The Chocolate Cappuccino Cheesecake is a sinfully rich and velvety smooth dessert, perfect for any coffee and chocolate lover.
It’s best made a day before serving to allow the flavors to meld beautifully.
Key Ingredients and Steps
Crust:
- 1 cup chocolate cookie crumbs
- ¼ cup butter, softened
- 2 tablespoons white sugar
- ¼ teaspoon ground cinnamon
Filling:
- 3 (8 ounce) packages cream cheese, softened
- 1 cup white sugar
- 3 eggs
- 8 (1 ounce) squares semisweet chocolate, melted
- 2 tablespoons whipping cream
- 1 cup sour cream
- ¼ teaspoon salt
- 2 teaspoons instant coffee granules dissolved in 1/4 cup hot water
- ¼ cup coffee-flavored liqueur
- 2 teaspoons vanilla extract
Topping:
- 1 cup heavy whipping cream
- 2 tablespoons confectioners’ sugar
- 2 tablespoons coffee-flavored liqueur
- 1 (1 ounce) square semisweet chocolate
Directions
1. Prepare the Crust:
- Preheat your oven to 350°F (175°C). Butter a 9 or 10-inch springform pan.
- Combine the chocolate cookie crumbs, softened butter, white sugar, and cinnamon. Mix well and press the mixture into the bottom of the springform pan. Set aside.
2. Make the Filling:
- In a medium bowl, beat the softened cream cheese until smooth. Gradually add the white sugar, mixing until well blended. Add the eggs, one at a time, beating at low speed until very smooth.
- Melt the semisweet chocolate with the whipping cream in a double boiler or microwave, stirring until smooth. Add the chocolate mixture to the cream cheese mixture and blend well.
- Stir in the sour cream, salt, dissolved coffee, coffee liqueur, and vanilla extract. Beat until smooth.
- Pour the mixture into the prepared pan.
3. Bake the Cheesecake:
- Bake in the center of the oven at 350°F (175°C) for 45 minutes. The center will be soft but will firm up when chilled. Do not overbake.
- After baking, turn off the oven, leave the oven door ajar, and let the cake sit in the oven for another 45 minutes.
- Remove the cake from the oven and let it chill in the refrigerator for 12 hours before serving.
4. Prepare the Topping:
- Just before serving, beat the whipping cream until soft peaks form. Beat in the confectioners’ sugar and coffee liqueur until well combined. Top the cheesecake with mounds of flavored whipped cream.
- For an added touch, garnish with chocolate leaves.
Tips for Best Results
- Preparation Time: Ensure you have about 4 hours, including chilling time, to prepare this cheesecake.
- Avoid Overbaking: The center of the cheesecake should still be soft when you turn off the oven. It will firm up as it cools.
- Chill Time: For best flavor, chill the cheesecake for at least 12 hours before serving.
- Chocolate Leaves: To make chocolate leaves, brush melted semisweet chocolate onto real non-toxic plant leaves, freeze until firm, and then peel off the leaves. These make a beautiful garnish.
- Serving Size: This recipe serves 12 people and is best enjoyed chilled.
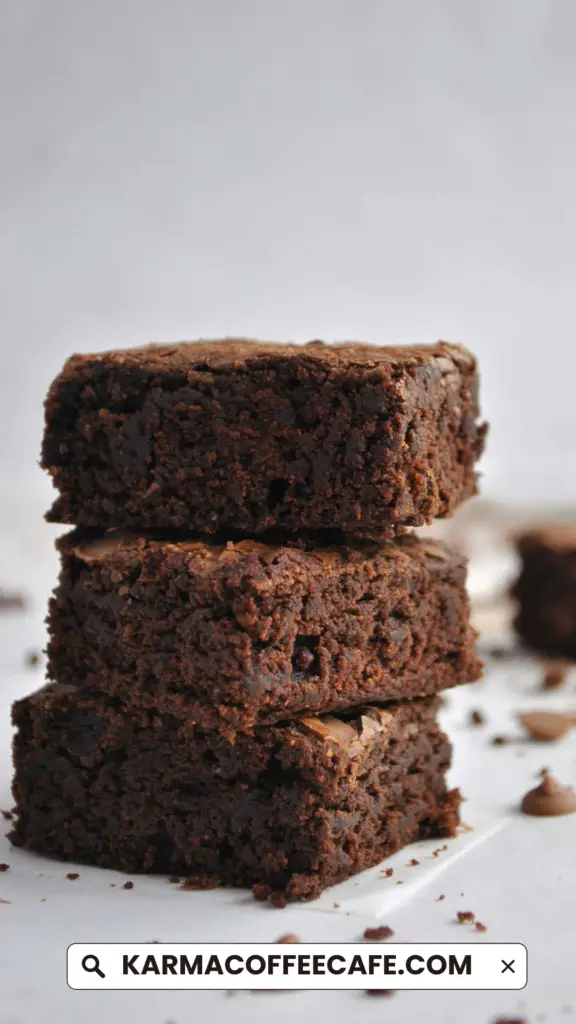
2. Coffee Brownies
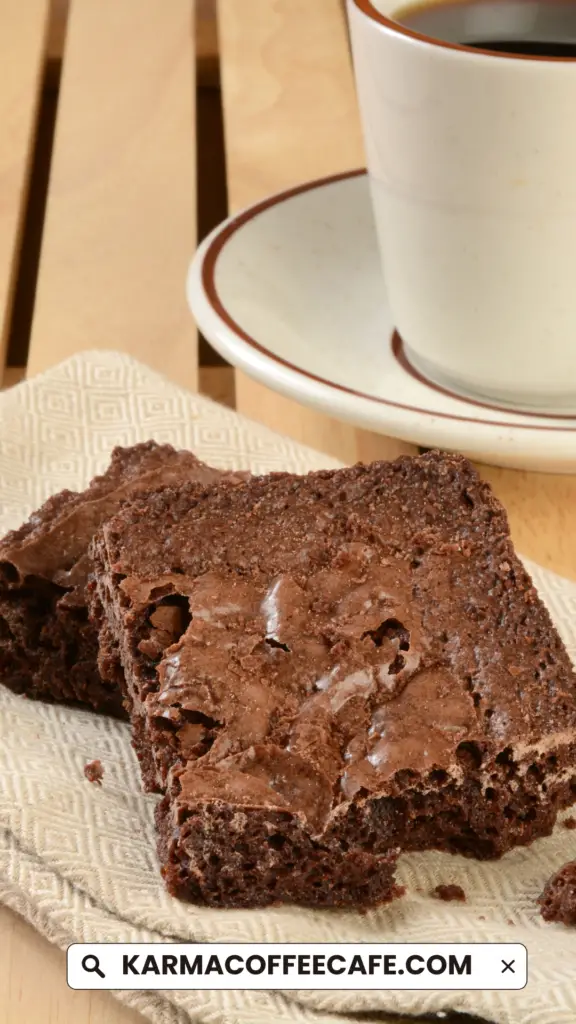
Coffee brownies are an easy-to-make dessert that combines the richness of chocolate with a deep coffee flavor.
These fudgy brownies are perfect for coffee lovers and anyone craving a decadent treat.
With their crackly tops and rich, moist interior, they offer a delightful twist on traditional brownies.
Key Ingredients and Steps
Ingredients:
- ⅔ cup all-purpose flour
- 1 tablespoon cocoa powder
- 1 tablespoon espresso powder
- ¼ teaspoon fine sea salt
- 5 oz semisweet chocolate (1 cup)
- ½ cup salted butter
- ¾ cup granulated sugar
- 2 teaspoons pure vanilla extract
- 2 large eggs
- ½ cup mix-ins (chocolate chips, nuts, etc., optional)
Instructions:
1. Preheat and Prepare:
- Preheat your oven to 350°F (175°C).
- Grease a 9×9” baking dish and set aside.
2. Mix Dry Ingredients:
In a small bowl, combine the flour, cocoa powder, espresso powder, and sea salt.
Set aside.
3. Melt Chocolate and Butter:
Melt the semisweet chocolate and butter together in a microwave-safe bowl or on the stovetop over low heat.
Stir until smooth and glossy. Set aside to cool slightly.
4. Prepare Wet Ingredients:
- In a large mixing bowl, beat the eggs for about 1 minute or until pale and thick.
- Add the sugar and beat for an additional 60 seconds until the sugar is dissolved and the mixture is fluffy.
5. Combine Mixtures:
Slowly add the melted chocolate and butter mixture to the egg and sugar mixture.
Stir in the vanilla extract and mix until smooth.
6. Add Dry Ingredients:
Gradually add the dry ingredient mixture, stirring on low speed until just incorporated and there are no lumps.
Be careful not to overmix.
7. Add Mix-ins:
If using, gently fold in chocolate chips or nuts.
8. Bake:
- Pour the batter into the prepared baking dish.
- Bake in the preheated oven for 25-30 minutes, or until the top is set and only slightly jiggly in the center.
- For gooey brownies, bake for 25 minutes; for firmer brownies, bake for 30 minutes.
9. Cool and Serve:
- Place the baking dish on a wire cooling rack to cool completely.
- Once cooled, cut the brownies into squares and serve.
Variations and Serving Suggestions
Serving Options:
- Plain: Enjoy the brownies as they are for a simple yet delicious treat.
- With Frosting: Top with chocolate buttercream frosting for an extra layer of sweetness.
- As a Sundae: Serve warm brownies with a scoop of vanilla ice cream and a drizzle of chocolate sauce.
Mix-In Ideas:
- Chocolate Chips: Add extra bursts of chocolate flavor.
- Nuts: Incorporate walnuts or pecans for added crunch and richness.
Storage Tips:
- Store brownies in an airtight container at room temperature for up to 3 days or in the refrigerator for up to a week.
- For longer storage, freeze brownies wrapped tightly in plastic wrap and placed in an airtight container for up to 2 months.
Recipe Adjustments:
- To double the recipe, use a 9×13” pan and bake for 25-30 minutes.
- For a gluten-free version, substitute the all-purpose flour with a 1:1 gluten-free flour blend.
3. Mocha Truffles
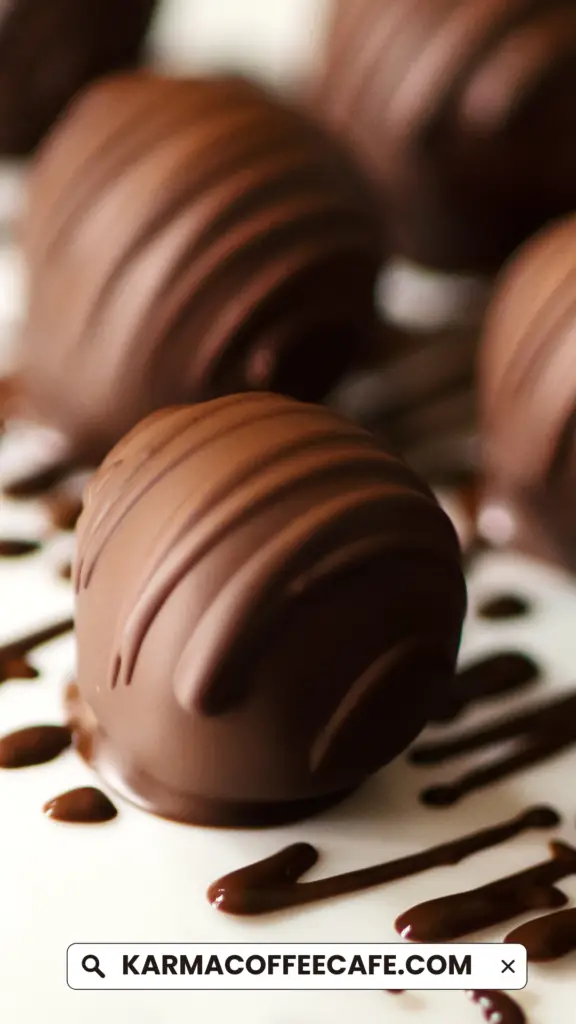
Mocha truffles are a decadent treat that combines the rich flavors of semi-sweet chocolate and instant coffee.
These truffles are perfect for special occasions like Valentine’s Day or cookie exchanges.
They have a dense, creamy texture with a delightful coffee kick, making them a favorite among coffee and chocolate lovers alike.
Key Ingredients and Steps
Ingredients:
Truffle:
- 1 (24 ounce) bag semi-sweet chocolate chips
- 8 ounces cream cheese, softened
- 3 tablespoons instant coffee granules
- 2 teaspoons water
Coating:
- 6 ounces semi-sweet chocolate chips
- 1 tablespoon shortening
Instructions:
1. Prepare Baking Sheet:
Line a baking sheet with waxed paper.
2. Melt Chocolate for Truffles:
Melt 24 ounces of chocolate chips in a microwave-safe bowl in 30-second intervals, stirring after each interval, for a total of 1 to 3 minutes.
3. Mix Ingredients:
- Mix the softened cream cheese, instant coffee granules, and water into the melted chocolate until smooth.
- Chill the mixture in the refrigerator until firm enough to shape, about 30 minutes.
4. Shape Truffles:
- Shape the chilled chocolate mixture into 1-inch balls and place them on the prepared baking sheet.
- Chill the truffles in the refrigerator until firm, at least 1 to 2 hours.
5. Prepare Coating:
Melt 6 ounces of chocolate chips and the shortening in a microwave-safe bowl in 30-second intervals, stirring after each interval, for a total of 1 to 3 minutes.
6. Coat Truffles:
- Dip each truffle into the melted chocolate coating and return them to the waxed paper.
- Allow the truffles to set for at least 30 minutes until the coating is firm.
Customization Options
Mocha truffles can be easily customized to suit your taste or occasion:
Alternative Coatings:
Use white or milk chocolate instead of semi-sweet for a different flavor profile.
Mix-ins:
Add a variety of mix-ins like chopped nuts, sprinkles, or crushed pretzels for added texture and flavor.
Boozy Version:
Substitute the instant coffee granules with coffee liqueur or another favorite liqueur for a boozy twist.
Decorations:
Sprinkle sea salt, cocoa powder, or edible glitter on top of the truffles before the coating sets for a decorative finish.
Serving and Storage
Serving Suggestions:
Serve the truffles as a delightful after-dinner treat or as part of a dessert platter.
Storage:
- Store the truffles in an airtight container at room temperature for up to 3 days or in the refrigerator for up to a week.
- For longer storage, freeze the truffles for up to 2 months. Wrap them tightly in plastic wrap and place them in an airtight container.
4. Double Chocolate Mocha Trifle
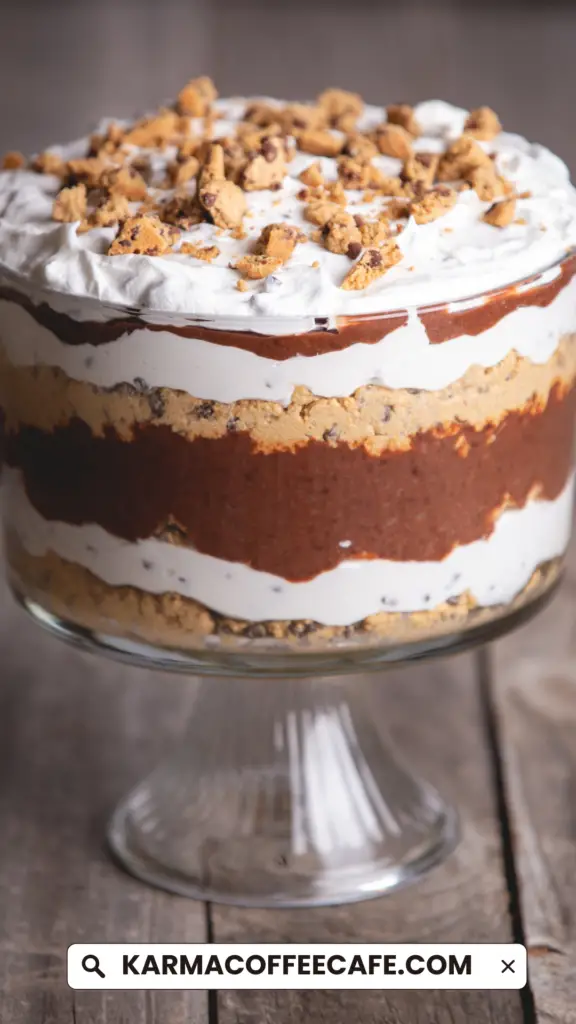
Double Chocolate Mocha Trifle is an indulgent dessert made with layers of rich brownies, creamy coffee-flavored white chocolate pudding, and crunchy chocolate-covered toffee.
It’s perfect for gatherings and is a favorite for its ease of preparation and delicious taste.
This dessert is sure to impress with its multiple layers of flavor and texture.
Key Ingredients and Steps
Ingredients:
- 1 (19.8 ounce) package brownie mix
- 1 ¾ cups cold milk
- 2 (3.3 ounce) packages instant white chocolate pudding mix
- 4 teaspoons instant coffee granules
- 2 tablespoons warm water
- 2 cups frozen whipped topping, thawed
- 3 (1.4 ounce) bars chocolate-covered toffee bars, chopped
Directions:
1. Prepare and Bake Brownies:
- Preheat your oven according to the brownie mix package directions.
- Prepare the brownies as per the package instructions for cake-like brownies.
- Once baked, allow the brownies to cool completely.
- Cut the cooled brownies into 1-inch cubes.
2. Prepare the Pudding Mixture:
- In a large bowl, whisk together the cold milk and the white chocolate pudding mix until it begins to thicken.
- In a small bowl, dissolve the instant coffee granules in the warm water.
- Add the dissolved coffee into the pudding mixture and mix well.
- Fold in the thawed whipped topping until fully incorporated.
3. Assemble the Trifle:
- In a large trifle bowl or glass punch bowl, layer 1/3 of the brownie cubes on the bottom.
- Top with 1/3 of the pudding mixture, spreading it evenly over the brownies.
- Sprinkle 1/3 of the chopped chocolate-covered toffee bars over the pudding layer.
- Repeat the layers two more times, ending with the toffee bar pieces on top.
4. Chill and Serve:
- Chill the assembled trifle in the refrigerator for at least 30 minutes before serving to allow the flavors to meld together.
- Serve chilled, and enjoy the rich, layered flavors of chocolate and coffee.
Presentation Tips
- Use a Glass Bowl: A clear glass bowl shows off the beautiful layers of the trifle, making it visually appealing.
- Decorate the Top: Garnish the top layer with additional whipped topping, toffee bar pieces, or a drizzle of chocolate syrup for extra flair.
- Serve with a Spoon: Provide a long-handled spoon for easy serving, allowing guests to scoop out all the layers in each serving.
5. Whole Wheat Chocolate Coffee Cake
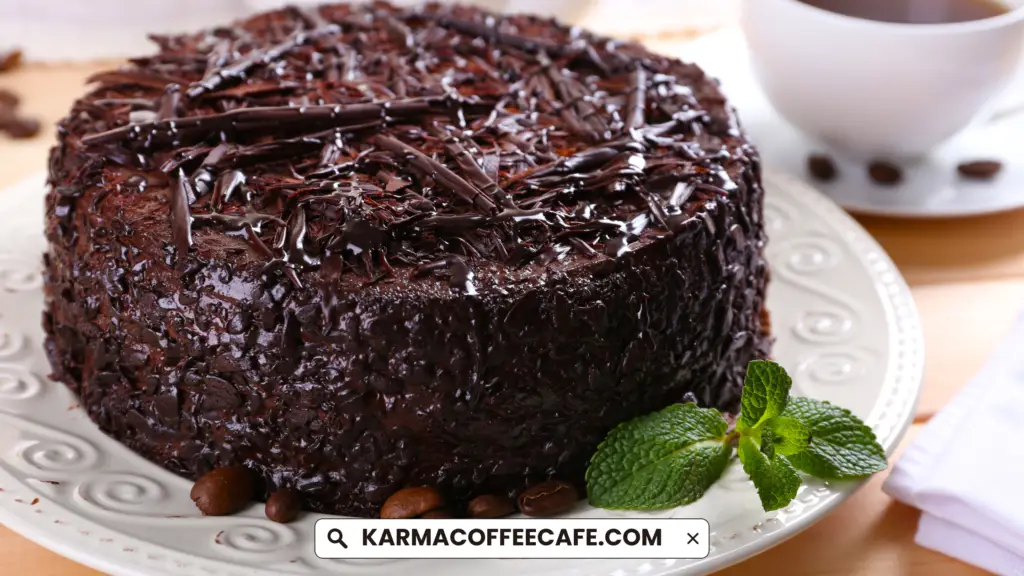
Whole Wheat Chocolate Coffee Cake is a moist and flavorful dessert that combines the richness of chocolate with the bold taste of coffee.
This cake is made with wholesome ingredients like Greek yogurt, applesauce, and whole wheat flour, making it a healthier option without compromising on taste.
It’s slightly fudgy, lightly sweet, and has hints of warm spices, making it perfect for any occasion.
Key Ingredients and Steps
Ingredients:
- 1 ¾ cups whole wheat flour
- 3 tablespoons unsweetened cocoa powder
- 1 teaspoon baking soda
- 1 teaspoon baking powder
- 1 teaspoon ground cinnamon
- 1 teaspoon ground cardamom (optional)
- ½ teaspoon salt
- ½ cup brewed black coffee, at room temperature
- 3 tablespoons instant espresso powder
- 1 cup plain whole-milk Greek yogurt
- ¾ cup unsweetened applesauce
- ¾ cup pure maple syrup
- 2 large eggs, at room temperature
- 1 ½ teaspoons vanilla extract
- 1 cup dark chocolate chips
- ¾ cup chopped walnuts (optional)
- 1 tablespoon powdered sugar, or to taste (optional)
Directions:
1. Preheat the Oven:
Preheat your oven to 350°F (175°C). Grease a 9-inch springform pan and set aside.
2. Prepare Dry Ingredients:
In a medium bowl, whisk together the whole wheat flour, cocoa powder, baking soda, baking powder, cinnamon, cardamom (if using), and salt.
3. Prepare Wet Ingredients:
In a large bowl, whisk together the brewed coffee and instant espresso powder until dissolved.
Add the Greek yogurt, applesauce, maple syrup, eggs, and vanilla extract. Whisk until thoroughly combined and smooth.
4. Combine Mixtures:
Gradually add the dry ingredients to the wet ingredients in two additions, mixing until just combined.
Do not overmix. Fold in the dark chocolate chips and chopped walnuts, if using.
5. Bake the Cake:
Pour the batter into the prepared springform pan.
Place the pan on a baking sheet and bake in the preheated oven for 50-60 minutes, or until a toothpick inserted into the center comes out with a few moist crumbs.
6. Cool the Cake:
Allow the cake to cool on a wire rack for 30 minutes.
Gently run a knife around the edges of the pan to loosen the cake.
Remove the sides of the pan and let the cake cool completely, about 15-30 minutes more.
7. Serve:
Dust the cooled cake with powdered sugar before serving.
Health Benefits
This Whole Wheat Chocolate Coffee Cake is not only delicious but also offers several health benefits:
- Whole Wheat Flour: Provides more fiber and nutrients compared to refined flour, aiding in digestion and providing sustained energy.
- Greek Yogurt: Adds protein and probiotics, which are beneficial for gut health.
- Applesauce: Used as a healthier alternative to butter or oil, reducing the overall fat content while keeping the cake moist.
- Maple Syrup: A natural sweetener that contains antioxidants and minerals like zinc and manganese.
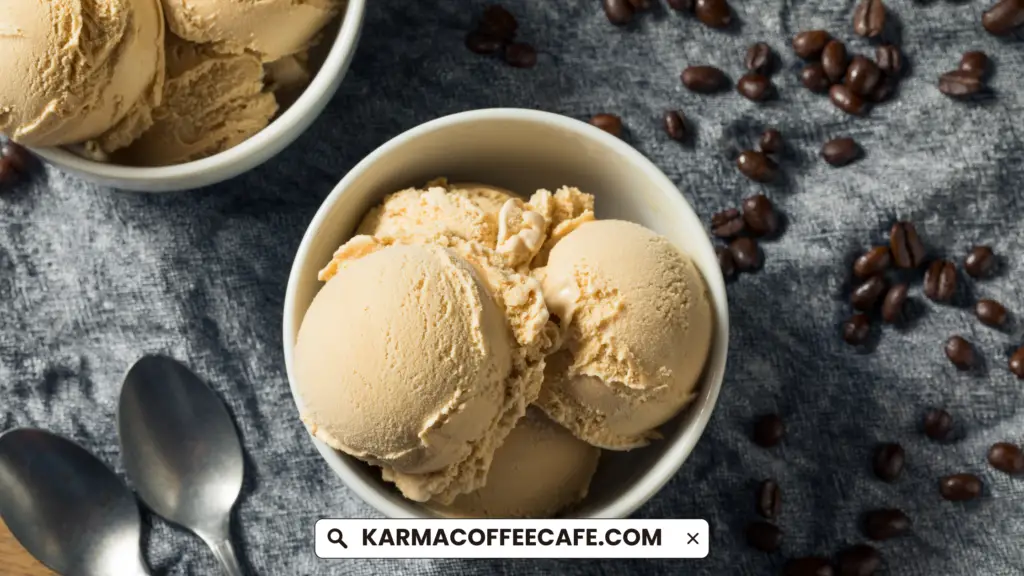
6. Caramel Macchiato Ice Cream
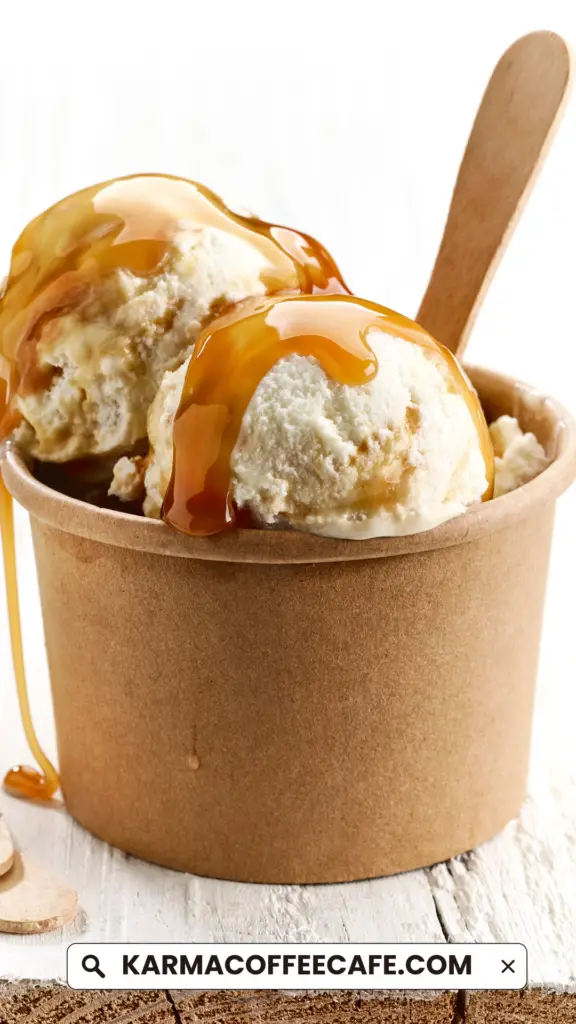
Caramel Macchiato Ice Cream is a delectable dessert that combines the flavors of vanilla bean and espresso ice cream, swirled with homemade salted caramel sauce.
This no-churn ice cream is easy to make and doesn’t require an ice cream machine.
With sweetened condensed milk and heavy whipping cream, it achieves a creamy and dense texture.
The rich coffee flavor makes it reminiscent of an affogato, perfect for coffee lovers.
Key Ingredients and Steps
Ingredients:
Homemade Salted Caramel Sauce:
- 1 cup (200g) granulated sugar
- 1/4 cup (2oz) water
- 1/4 cup (56g) salted butter, softened
- 1/2 cup (4oz) heavy cream
- 1/2 tsp fine sea salt
- 1 tsp vanilla extract or vanilla bean paste
Ice Cream:
- 2 cups (18oz) heavy whipping cream, cold
- 1 can (14oz) sweetened condensed milk
- Tiny pinch fine sea salt
- 1 Tbsp vanilla bean paste
- 4 oz chilled espresso
- 1/2 cup salted caramel sauce (or more)
Directions:
Homemade Salted Caramel Sauce:
- Combine sugar and water in a medium-sized heavy-bottom saucepan. Swirl the pan to immerse the sugar in water.
- Place the saucepan over medium heat, allowing the sugar to dissolve, gently swirling the pan every minute or so.
- Once the mixture reaches a simmer, lower the heat to medium-low and let it darken to an amber color (about 10 minutes). If crystallization occurs on the edge of the pan, use a wet pastry brush to brush down the sides.
- Remove the pan from heat and stir in the butter until fully combined.
- Carefully pour in the heavy cream while stirring constantly, avoiding aggressive stirring near the edges. If any hard chunks remain, leave them in the pot.
- Pour the caramel sauce into a heatproof jar and stir in the salt and vanilla extract. Allow it to cool.
Ice Cream:
- In a large bowl, whip the cold heavy whipping cream at medium speed until it starts to thicken, then increase the speed to high and beat until stiff peaks form.
- Add the sweetened condensed milk, vanilla bean paste, and a pinch of sea salt, and beat just until combined.
- Divide the ice cream mixture in half. In one half, gently stir in the chilled espresso.
- In a freezer-safe container, alternate spoonfuls of the vanilla and coffee ice cream mixtures. Drizzle salted caramel sauce over each layer and use a knife to swirl it through.
- Cover the container with a lid, plastic wrap, or foil, and freeze for at least 8 hours or overnight.
Serving Suggestions
- Plain: Enjoy the ice cream as is, letting the rich flavors of coffee and caramel shine.
- With Toppings: Add a dollop of whipped cream, a drizzle of extra caramel sauce, and a sprinkle of chocolate shavings or nuts for an indulgent treat.
- Affogato Style: Serve a scoop of caramel macchiato ice cream in a glass and pour a shot of hot espresso over it for a delicious affogato experience.
7. Mocha Meringue Sandwich Cookies
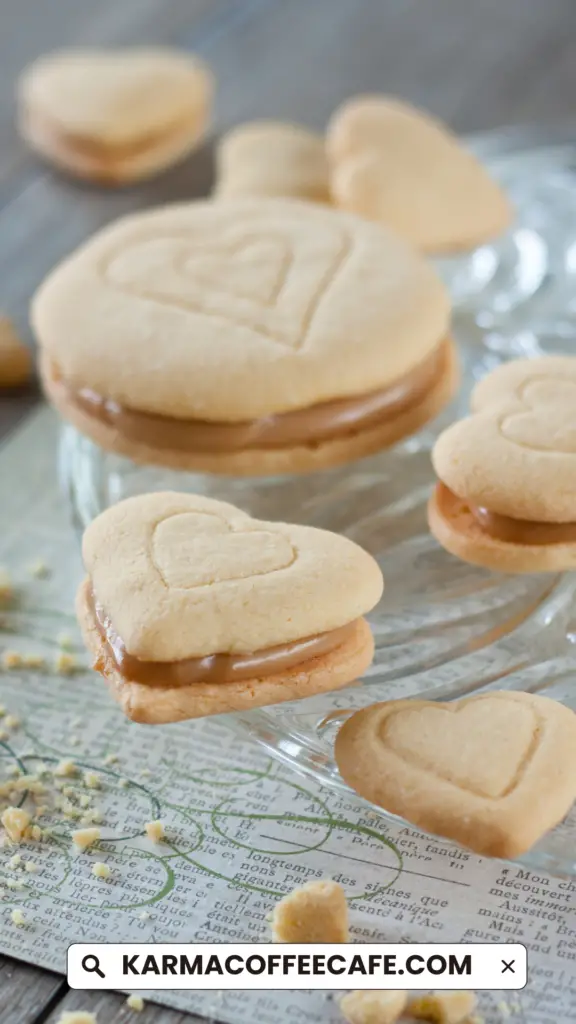
Mocha Meringue Sandwich Cookies are delightful treats that are both crisp and chewy.
These cookies, which can be made in various sizes, are versatile and can be filled with a range of fillings such as fruit preserves.
They are perfect for special occasions or as an everyday treat.
Key Ingredients and Steps
Ingredients:
- 3 large egg whites, room temperature
- 1/4 teaspoon cream of tartar
- 1 teaspoon instant coffee granules
- 3/4 cup sugar
- 1/2 cup confectioners’ sugar
- 1/4 cup baking cocoa
- 3/4 cup chocolate frosting
- Additional confectioners’ sugar for dusting
Directions:
1. Preheat Oven:
Preheat the oven to 350°F (175°C).
Line baking sheets with parchment paper.
2. Prepare Coffee Mixture:
In a small bowl, sift the instant coffee granules, 1/2 cup confectioners’ sugar, and cocoa together to ensure they are well combined.
3. Beat Egg Whites:
- Place the egg whites in a large bowl. Add the cream of tartar and beat on medium speed until foamy.
- Gradually add the sugar, 1 tablespoon at a time, beating on high after each addition until the sugar is dissolved.
- Continue beating until stiff, glossy peaks form.
4. Fold in Coffee Mixture:
Gently fold the coffee mixture into the beaten egg whites until well combined.
5. Pipe Meringue:
Transfer the meringue to a pastry bag fitted with a #11 round pastry tip.
Pipe 1 3/4-inch spirals onto the prepared baking sheets, spacing them about 1 inch apart.
6. Bake Meringues:
Bake the meringues for 12-15 minutes or until they are set and dry.
Let them cool completely before removing them from the parchment paper.
7. Assemble Cookies:
- Spread about 1 1/2 teaspoons of chocolate frosting onto the bottom of half of the meringues.
- Top with the remaining meringues to form sandwich cookies.
8. Finish:
Dust the assembled cookies with additional confectioners’ sugar.
Filling Variations
Mocha Meringue Sandwich Cookies can be filled with a variety of delicious fillings to suit different tastes:
- Fruit Preserves: Use raspberry, strawberry, or apricot preserves for a fruity twist.
- Nutella: Spread a layer of Nutella for a rich and creamy filling.
- Peanut Butter: Combine peanut butter with a touch of honey for a sweet and savory option.
- Lemon Curd: Add a zesty and tangy flavor with lemon curd.
- Cream Cheese Frosting: Mix cream cheese with powdered sugar and a bit of vanilla for a tangy, sweet filling.
Tips for Success
- No Grease: Ensure that the bowl and beaters are completely grease-free before beating the egg whites.
- Substitute for Cream of Tartar: If you don’t have cream of tartar, use 1/2 teaspoon of lemon juice or white vinegar to stabilize the egg whites.
- Stronger Coffee Flavor: Substitute espresso powder for instant coffee granules for a more intense coffee flavor.
8. Fudgy Layered Irish Mocha Brownies
Fudgy Layered Irish Mocha Brownies are a rich and decadent dessert, perfect for those who love the combination of chocolate and coffee with a hint of Irish cream.
These brownies feature a fudgy base, a creamy Irish cream frosting, and a smooth ganache topping.
This layered dessert is sure to impress at any gathering.
Key Ingredients and Steps
Ingredients:
Brownie Layer:
- 2/3 cup all-purpose flour
- 1/2 teaspoon baking powder
- 1/4 teaspoon salt
- 1/3 cup butter
- 6 tablespoons baking cocoa
- 2 tablespoons canola oil
- 1/2 teaspoon instant coffee granules
- 1 cup sugar
- 2 large eggs, room temperature, beaten
- 1 teaspoon vanilla extract
Frosting:
- 2 cups confectioners’ sugar
- 1/4 cup butter, softened
- 3 tablespoons Irish cream liqueur
Ganache Topping:
- 1 cup semisweet chocolate chips
- 3 tablespoons Irish cream liqueur
- 2 tablespoons heavy whipping cream
Directions:
1. Preheat Oven:
- Preheat your oven to 350°F (175°C).
- Grease an 8-inch square baking pan.
2. Prepare Brownie Layer:
- In a small saucepan over low heat, melt the butter. Remove from heat and stir in the cocoa powder, canola oil, and instant coffee granules.
- Allow the mixture to cool slightly, then stir in the sugar and beaten eggs until well combined.
- Gradually add the flour mixture (flour, baking powder, salt) and vanilla extract, mixing until just combined.
- Spread the batter evenly into the prepared baking pan and bake for about 25 minutes, or until the center is set. Do not overbake. Cool the brownies in the pan on a wire rack.
3. Prepare Frosting:
- In a medium bowl, whisk together the confectioners’ sugar and softened butter until the mixture is lumpy.
- Gradually whisk in the Irish cream liqueur until the frosting is smooth.
- Spread the frosting over the slightly warm brownies and refrigerate until set, about 1 hour.
4. Prepare Ganache:
- In a microwave-safe bowl, combine the semisweet chocolate chips, Irish cream liqueur, and heavy whipping cream. Microwave on high for 1 minute, then stir. If needed, microwave for an additional 30 seconds and stir until smooth.
- Allow the ganache to cool slightly until it reaches a spreading consistency.
- Spread the ganache evenly over the set frosting layer. Refrigerate until the ganache is firm, about 45-60 minutes.
5. Serve:
Once the ganache has set, cut the brownies into 16 squares and serve.
Layering Techniques
- Even Layers: Ensure each layer is spread evenly to achieve a uniform look and consistent taste in every bite.
- Cooling Between Layers: Allow each layer to cool and set before adding the next. This prevents mixing and maintains the distinct layers.
- Using a Knife for Spreading: Use a flat knife or offset spatula to spread the frosting and ganache smoothly.
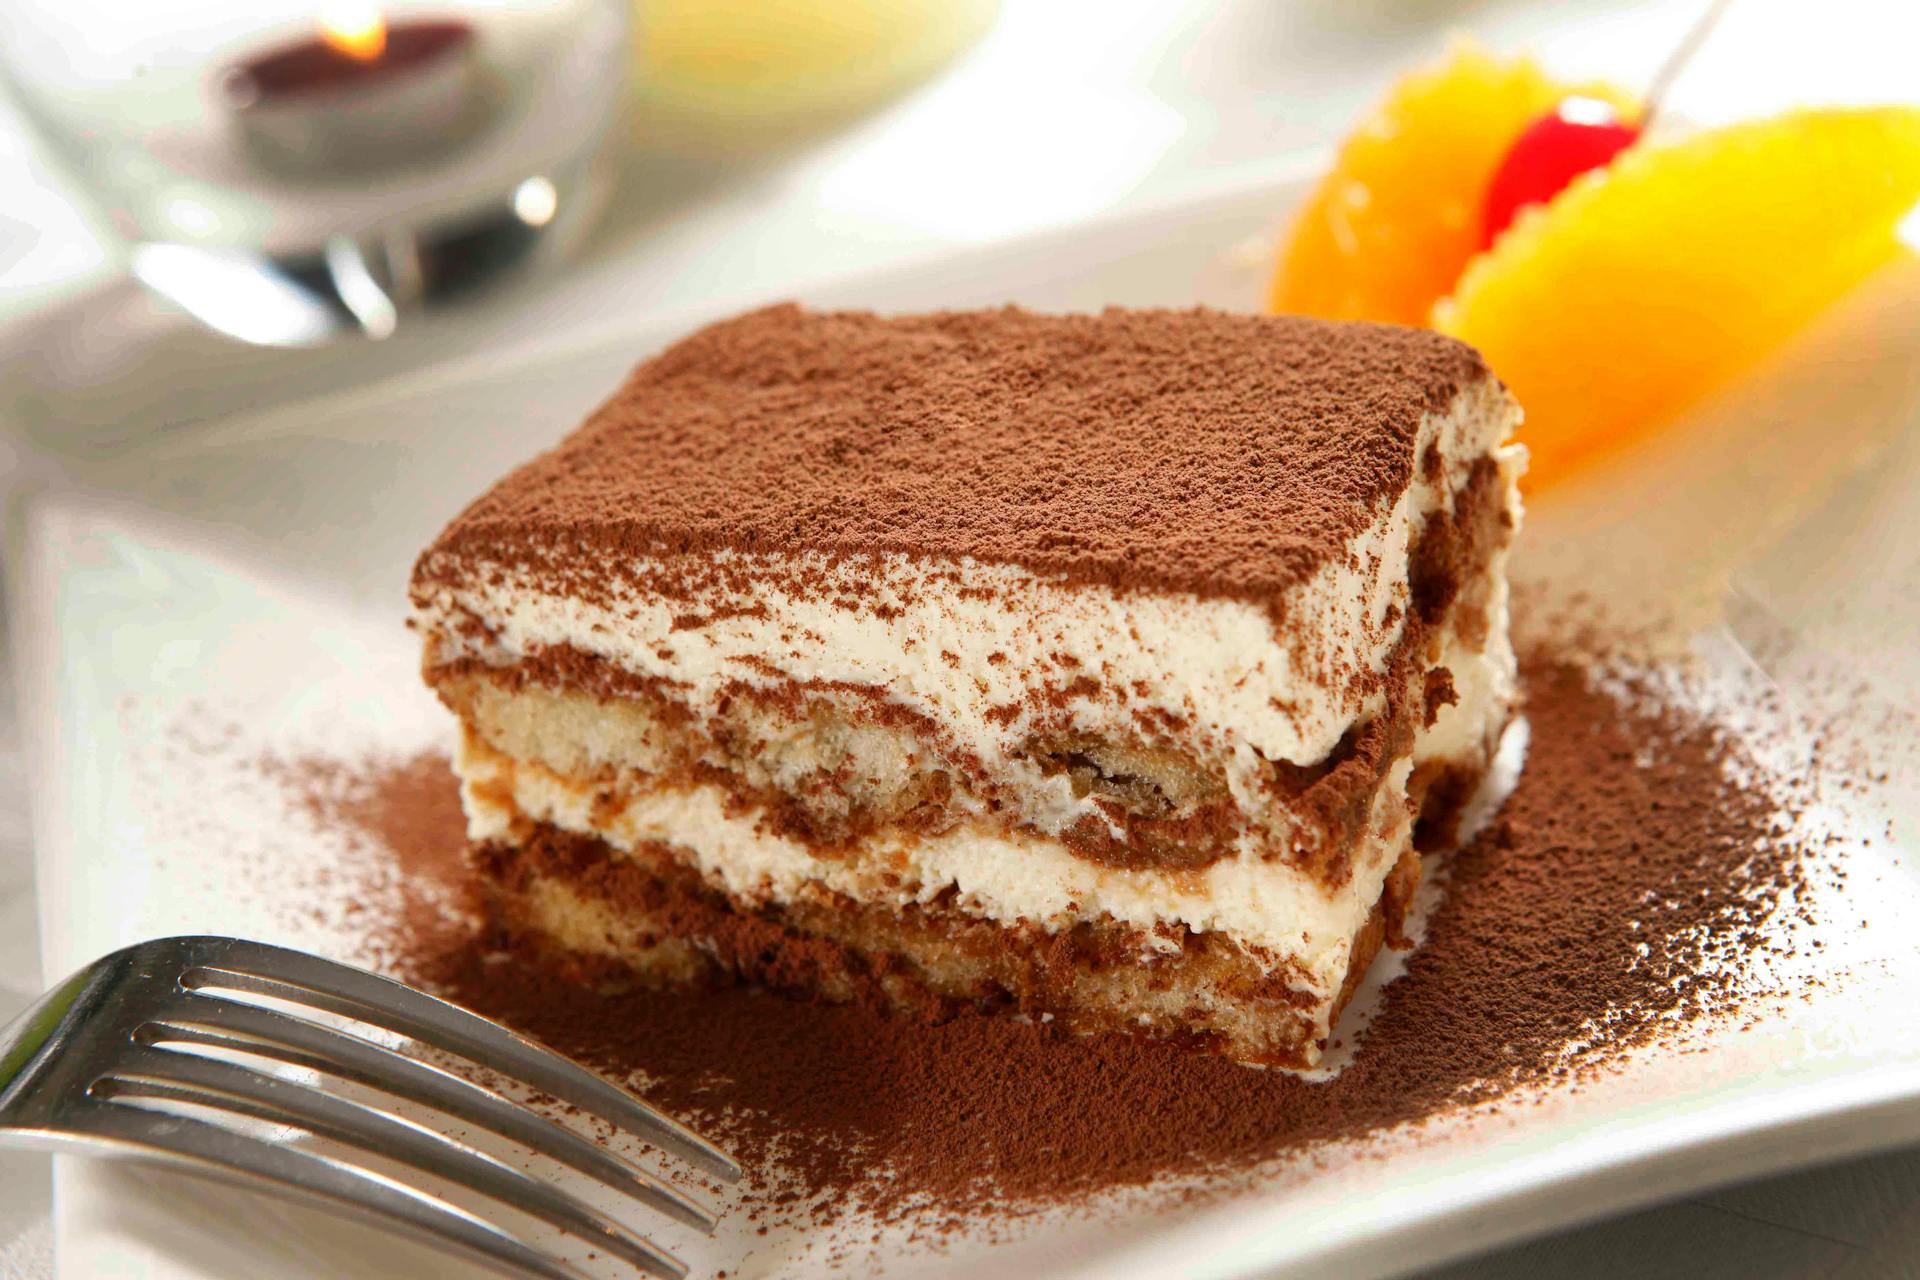
9. Quick and Easy Tiramisu
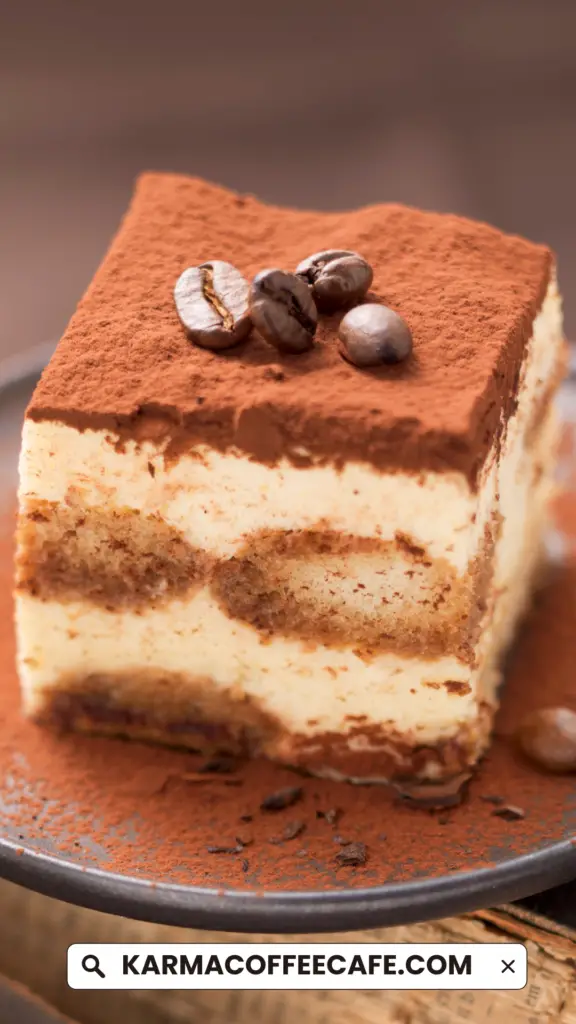
This Tiramisu recipe simplifies the traditional method while maintaining delicious results.
This version uses fresh heavy dairy cream, mascarpone cheese, sugar, and vanilla, eliminating the need for separating eggs or making custard.
It’s perfect for those looking for a quick, easy, and indulgent dessert.
Key Ingredients and Steps
Ingredients:
- 1 cup (8 floz/225 ml) heavy whipping cream
- 1 cup (8 oz/225 g) mascarpone cheese, room temperature (substitution below)
- 1/3 cup (2 1/2 oz/71 g) sugar
- 1 teaspoon vanilla extract
- 1 tablespoon Amaretto liquor or brandy (optional)
- 2 cups (16 oz/450 ml) espresso or strong coffee, at room temperature
- 1 pack ladyfingers (Boudoir biscuits/Savoiardi; look for egg-free ladyfingers if needed)
- Cocoa powder for dusting the top
Instructions:
1. Prepare the Cream Mixture:
- In a mixing bowl, beat the heavy whipping cream, sugar, and vanilla extract until soft peaks form.
- Add the mascarpone cheese and Amaretto (if using), and continue to whip until stiff peaks form.
2. Dip the Ladyfingers:
- Quickly dip the ladyfingers in coffee (and brandy if using) and place them in an 8×8 pan to create the first layer.
- Avoid soaking them as they will fall apart; a quick dunk is enough.
3. Layer the Tiramisu:
- Spread half of the whipped cream mixture on top of the first layer of ladyfingers.
- Repeat the process with a second layer of coffee-dipped ladyfingers and the remaining cream mixture.
4. Finish and Chill:
- Dust the top of the dessert with cocoa powder using a fine sieve.
- Refrigerate for about 2-4 hours before serving to allow the flavors to meld together.
Make-Ahead Tips
- Advance Preparation: Tiramisu benefits from being made ahead of time. Refrigerate for at least 2-4 hours or up to overnight to allow the flavors to blend and the dessert to firm up.
- Storage: Store in the refrigerator for up to 2-3 days.
- Freezing: Tiramisu can be frozen for up to 3 months if tightly wrapped. Freeze without the cocoa powder; add it after thawing. Thaw in the refrigerator overnight before serving.
Mascarpone Cheese Substitution
Combine 6 oz softened cream cheese, 2 tablespoons sour cream, and 3 tablespoons heavy cream.
Use this mixture in place of mascarpone.
Additional Notes
- No Raw Eggs: This recipe avoids raw eggs, making it safer and simpler.
- Alcohol Options: If using alcohol, incorporate Amaretto into the cream mixture and brandy into the coffee mixture. Adjust based on preference.
- Variations: Consider making a Summer Berry Tiramisu or a Chocolate Tiramisu for a twist on the classic recipe.
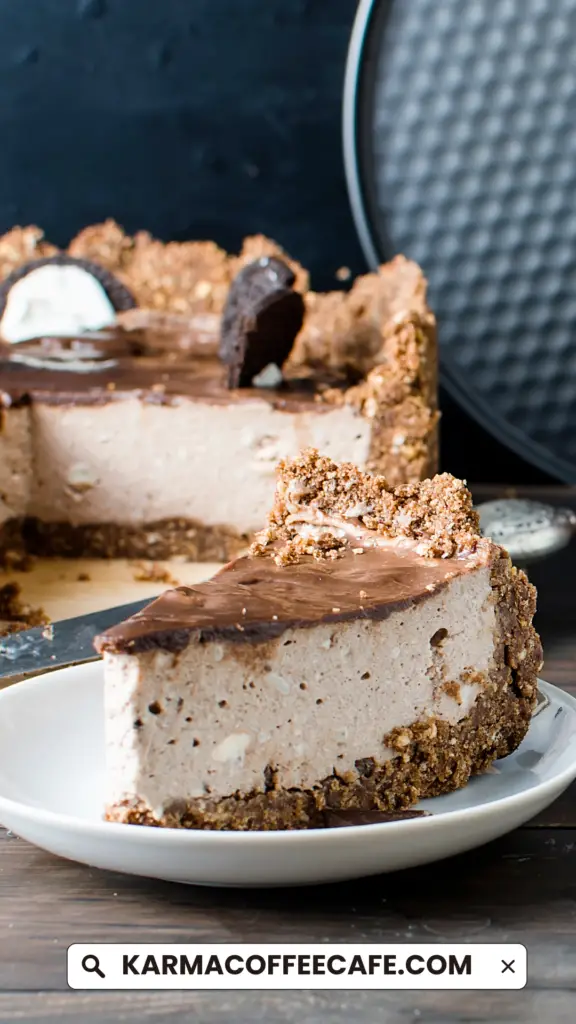
10. Salted Caramel Cappuccino Cheesecake
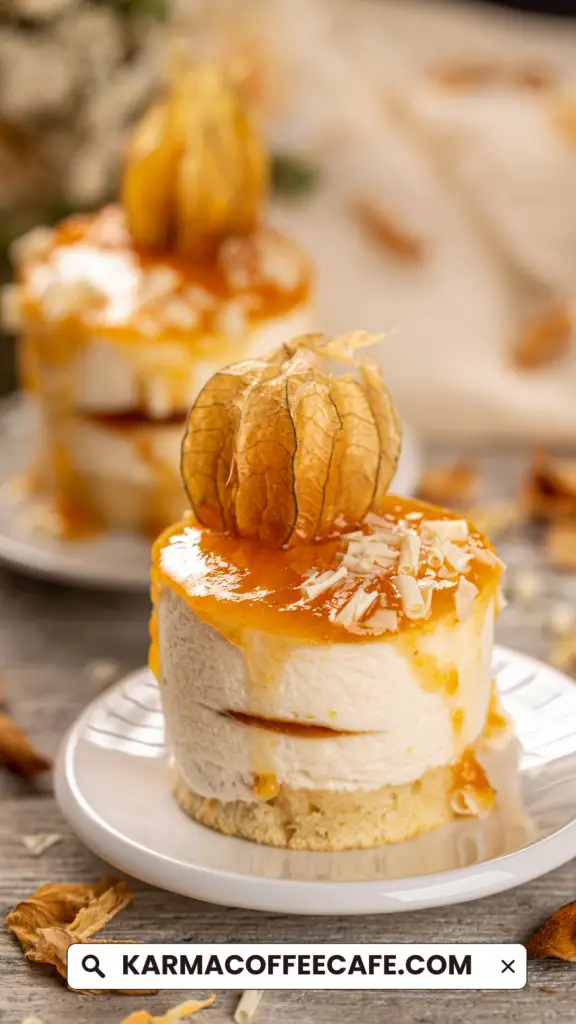
Salted Caramel Cappuccino Cheesecake combines the rich flavors of salted caramel, coffee, and espresso into a luxurious dessert.
This cheesecake offers a perfect balance of sweetness and a hint of saltiness.
Key Ingredients and Steps
Ingredients:
Crust:
- 1 package (9 ounces) chocolate wafers
- 1 cup packed brown sugar
- 1 cup semisweet chocolate chips
- 1/2 cup butter, melted
Filling:
- 3 packages (8 ounces each) cream cheese, softened
- 1 cup packed brown sugar
- 1/2 cup sour cream
- 1/4 cup Kahlua (coffee liqueur)
- 2 tablespoons instant espresso powder
- 2 tablespoons all-purpose flour
- 1/8 teaspoon ground nutmeg
- 4 large eggs, lightly beaten
Topping:
- 1/2 cup hot caramel ice cream topping
- 1/2 teaspoon coarse sea salt
Directions:
1. Preheat the Oven:
- Preheat your oven to 350°F (176°C).
- Grease a 9-inch springform pan and place it on a double thickness of heavy-duty foil (about 18 inches square).
- Securely wrap the foil around the pan to prevent water from seeping in during the water bath.
2. Prepare the Crust:
- In a food processor, combine the chocolate wafers, 1 cup of brown sugar, and chocolate chips. Pulse until fine crumbs form.
- Gradually add the melted butter, pulsing until well combined.
- Press the mixture onto the bottom and 2 inches up the side of the prepared springform pan.
3. Make the Filling:
- In a large bowl, beat the softened cream cheese and 1 cup of brown sugar until smooth.
- Beat in the sour cream, Kahlua, flour, and espresso powder until well blended.
- Add the beaten eggs and mix on low speed just until combined.
4. Bake the Cheesecake:
- Pour the filling over the prepared crust.
- Place the springform pan in a larger baking pan and add 1 inch of hot water to the larger pan to create a water bath.
- Bake until the center is just set and the top appears dull, about 55-65 minutes.
- Remove the springform pan from the water bath and remove the foil.
- Cool the cheesecake on a wire rack for 10 minutes.
- Run a knife around the edge to loosen the crust, then cool for 1 hour longer.
- Cover and refrigerate overnight.
5. Add the Topping:
- Before serving, pour the caramel topping over the cheesecake and refrigerate for at least 15 minutes.
- Just before serving, remove the rim from the pan and sprinkle with coarse sea salt.
Serving Suggestions
- Presentation: Slice the cheesecake into 12 even pieces for serving. For a cleaner cut, use a knife dipped in hot water and wiped clean between slices.
- Garnish: Add a dollop of whipped cream and a sprinkle of chocolate shavings for an extra touch of elegance.
- Pairing: Serve with a cup of hot coffee or espresso to complement the cheesecake’s flavors.
11. Mocha Hazelnut Torte
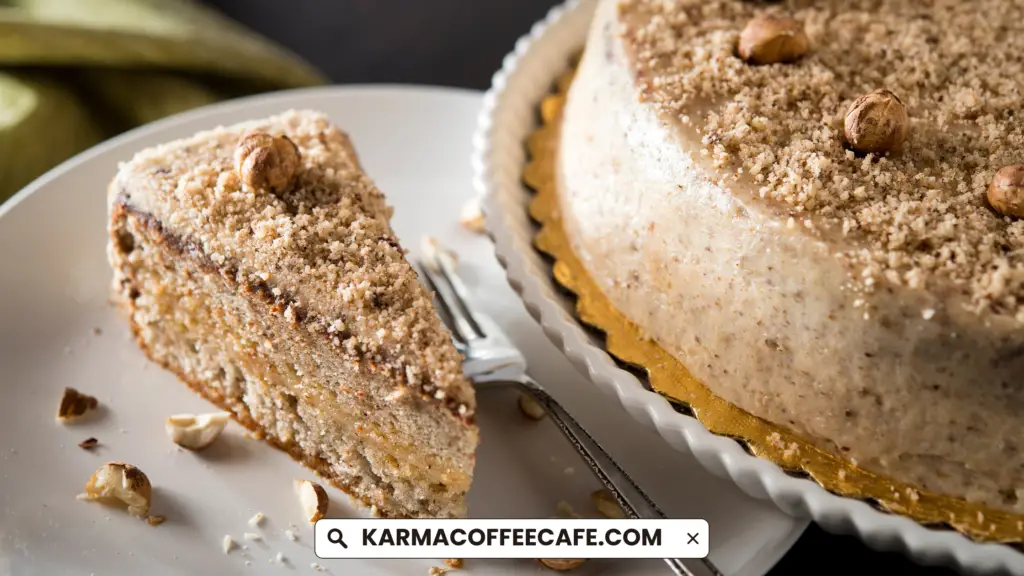
Mocha Hazelnut Torte is a decadent cake, perfect for special occasions due to its impressive look and rich taste.
This torte beautifully combines the mild flavors of hazelnut and coffee, creating a delightful dessert that will impress your guests.
Ingredients:
Cake:
- 3/4 cup butter, softened
- 1/2 teaspoon baking powder
- 1-1/4 cups packed brown sugar
- 1 cup sugar
- 1-1/2 cups 2% milk
- 3 large eggs, room temperature
- 3 ounces unsweetened chocolate, melted and cooled slightly
- 2 teaspoons vanilla extract
- 2-1/4 cups all-purpose flour
- 1 tablespoon instant espresso powder
- 1 teaspoon baking soda
- 1/4 teaspoon salt
Frosting:
- 1 cup butter, softened
- 1 cup Nutella
- 4 cups confectioners’ sugar
- 1 teaspoon vanilla extract
- 3 to 4 tablespoons 2% milk
Decoration:
1/2 cup chopped hazelnuts, toasted
Directions:
1. Preheat Oven:
- Preheat the oven to 350°F.
- Line the bottoms of two greased 9-inch round baking pans with parchment paper.
- Grease the parchment paper as well.
2. Prepare the Cake Batter:
- In a large bowl, cream together the butter, brown sugar, and sugar until light and fluffy, which takes about 5-7 minutes.
- Add the eggs, one at a time, beating well after each addition.
- Beat in the melted chocolate and vanilla extract.
- In another bowl, whisk together the flour, instant espresso powder, baking soda, baking powder, and salt.
- Gradually add the dry ingredients to the creamed mixture, alternating with milk, and beat well after each addition.
- Transfer the batter evenly to the prepared pans.
3. Bake the Cake:
- Bake the cakes for 25-30 minutes or until a toothpick inserted into the center comes out clean.
- Cool the cakes in the pans for 10 minutes before removing them to wire racks to cool completely. Remove the parchment paper.
4. Prepare the Frosting:
- In a large bowl, beat the butter and Nutella until well blended.
- Gradually add the confectioners’ sugar, vanilla extract, and enough milk to reach the desired consistency.
- Beat until smooth and creamy.
5. Assemble the Torte:
- Place one cake layer on a serving plate. Spread 1 cup of frosting over the top and sprinkle with 1/4 cup of chopped hazelnuts.
- Top with the remaining cake layer. Frost the top and sides of the cake with the remaining frosting.
- Sprinkle the remaining chopped hazelnuts over the top of the cake.
Decoration Ideas
- Drizzle with Chocolate: Melt some dark chocolate and drizzle it over the top for an elegant finish.
- Piped Frosting: Use a piping bag to create decorative swirls or patterns on top of the cake.
- Whole Hazelnuts: Garnish with whole hazelnuts for added texture and visual appeal.
- Edible Gold Dust: Lightly dust the top with edible gold dust for a luxurious touch.
12. Morning Buzz Rice Krispies Treats
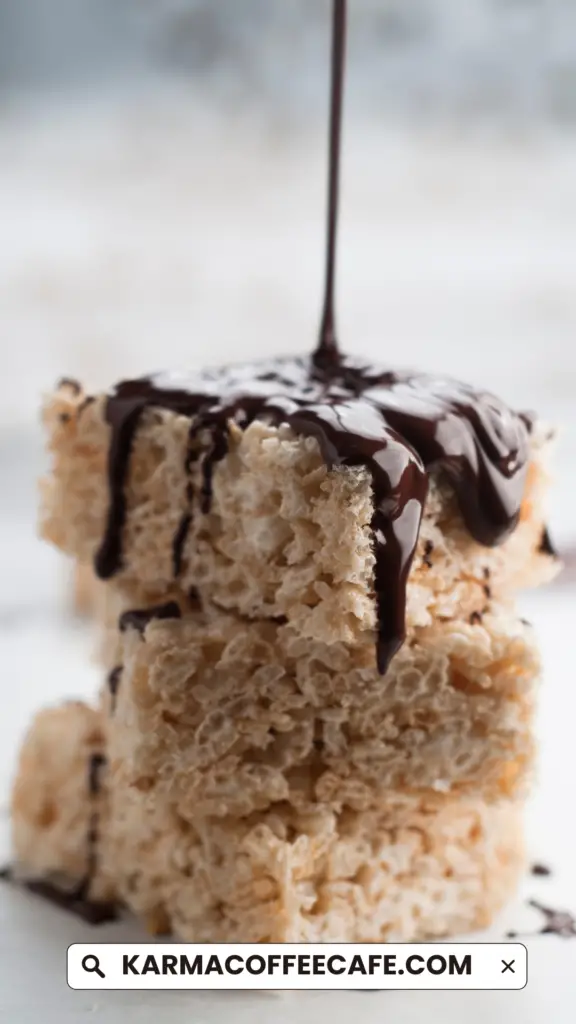
Morning Buzz Rice Krispies Treats are a delightful twist on the classic cereal bar, infused with a caffeine kick.
These treats are perfect for coffee lovers looking for a sweet and energizing snack.
Ingredients:
- 1 package (10 ounces) miniature marshmallows
- 5 cups Rice Krispies cereal
- 1 cup chocolate-covered espresso beans, coarsely chopped and divided
- 3 tablespoons canola oil
- 2 teaspoons coffee extract
- 2 cups dark chocolate chips, melted
Directions:
1. Melt the Marshmallows:
- In a microwave-safe bowl or a large saucepan over low heat, melt the marshmallows with the canola oil, stirring until smooth.
- Remove from heat and stir in the coffee extract.
2. Mix in the Cereal:
Stir in the Rice Krispies cereal and 1/2 cup of the coarsely chopped chocolate-covered espresso beans until evenly combined.
3. Press into Pan:
- Press the mixture into a lightly greased 13×9-inch baking pan, using waxed paper or a lightly greased spatula to flatten it evenly.
- Let it cool to room temperature.
4. Add Chocolate and Espresso Beans:
- Spread the melted dark chocolate chips evenly over the cooled Rice Krispies mixture.
- Sprinkle the remaining 1/2 cup of chopped espresso beans on top.
5. Cut and Serve:
Once the chocolate has set, cut into bars and serve.
Customization Options
- Different Flavors: Substitute the coffee extract with vanilla, almond, or caramel extract for a different flavor profile.
- Nutty Addition: Add chopped nuts such as almonds, pecans, or walnuts for extra crunch and flavor.
- White Chocolate: Use white chocolate chips instead of dark chocolate for a sweeter variation.
- Dried Fruit: Mix in dried cranberries or cherries for a fruity twist.
13. Chocolate Espresso-Nut Torte
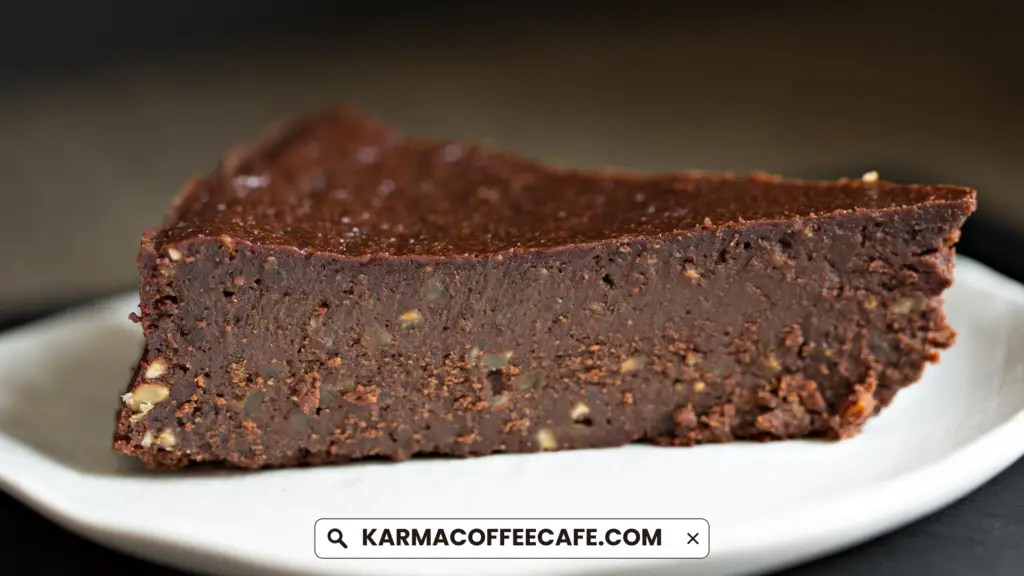
The Chocolate Espresso-Nut Torte is a rich and indulgent dessert that beautifully combines the flavors of chocolate and nuts.
This torte is perfect for special occasions and can be served with sweetened whipped cream or ice cream.
Ingredients:
For the Torte:
- 5 large eggs, separated
- 1 teaspoon instant espresso powder
- 1 teaspoon baking cocoa
- 1 teaspoon almond extract
- 1 cup hazelnuts, toasted and skins removed
- 1/4 teaspoon salt
- 3 tablespoons dark brown sugar
- 1/2 cup butter, softened
- 6 ounces bittersweet chocolate, melted and cooled
- 2/3 cup sugar
For the Ganache:
- 1/2 cup heavy whipping cream
- 6 ounces bittersweet chocolate, chopped
- 1/2 cup finely chopped almonds, toasted
Directions:
1. Preparation:
- Place egg whites in a large bowl and let stand at room temperature for 30 minutes.
- Line the bottom of a greased 9-inch springform pan with waxed paper, grease the paper, and dust with cocoa.
2. Making the Batter:
- Place hazelnuts and brown sugar in a food processor; cover and process until ground.
- In a second large bowl, cream butter and sugar until light and fluffy, which takes about 5-7 minutes.
- Add egg yolks, one at a time, beating well after each addition.
- Beat in the melted chocolate, espresso powder, almond extract, and salt.
- Gradually add the hazelnut mixture.
3. Combining Ingredients:
- In the first large bowl, with clean beaters, beat egg whites until stiff peaks form.
- Fold the egg whites into the batter.
- Spread the batter into the prepared pan. Place the pan on a baking sheet.
4. Baking:
- Bake at 375°F for 35-40 minutes or until a toothpick inserted in the center comes out with a few moist crumbs.
- Cool on a wire rack to room temperature. Remove the side of the pan and invert the torte onto a serving plate.
5. Making the Ganache:
- Place chopped chocolate in a small bowl.
- In a small saucepan, bring cream just to a boil.
- Pour the hot cream over the chocolate; whisk until smooth.
- Cool the ganache, stirring occasionally, to room temperature or until it reaches a spreading consistency, about 30 minutes.
6. Finishing:
- Spread the ganache over the top and sides of the torte.
- Press the finely chopped toasted almonds around the side.
- Cover and refrigerate the torte for 30 minutes or until the ganache is set.
Pairing Suggestions
- Coffee: Serve with a hot cup of espresso or coffee to complement the rich chocolate and nut flavors.
- Ice Cream: A scoop of vanilla or coffee ice cream pairs beautifully with the torte.
- Wine: Pair with a sweet dessert wine, such as a late harvest Riesling or a port, to enhance the chocolate flavors.
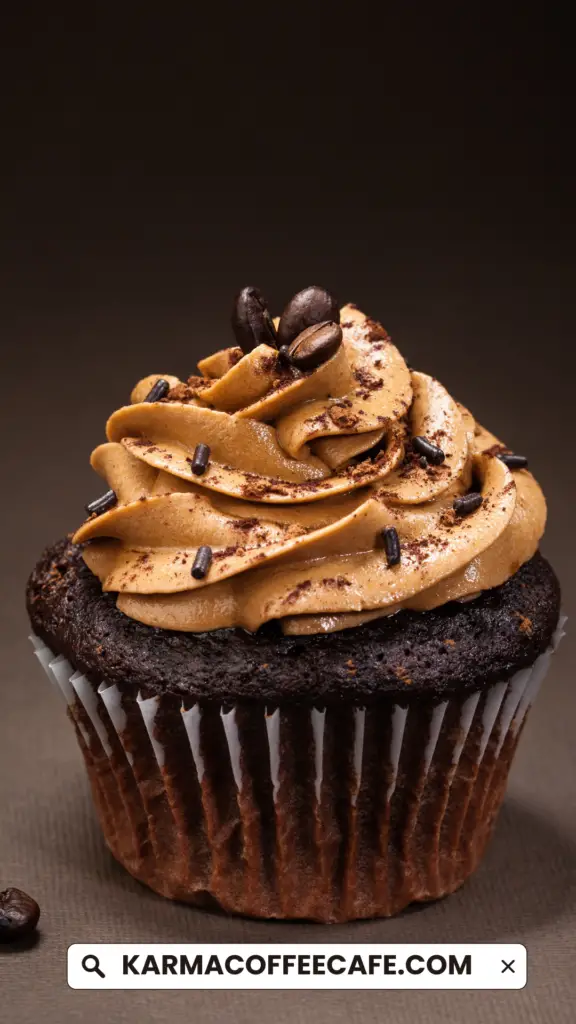
14. Fluffy Coffee Cupcakes
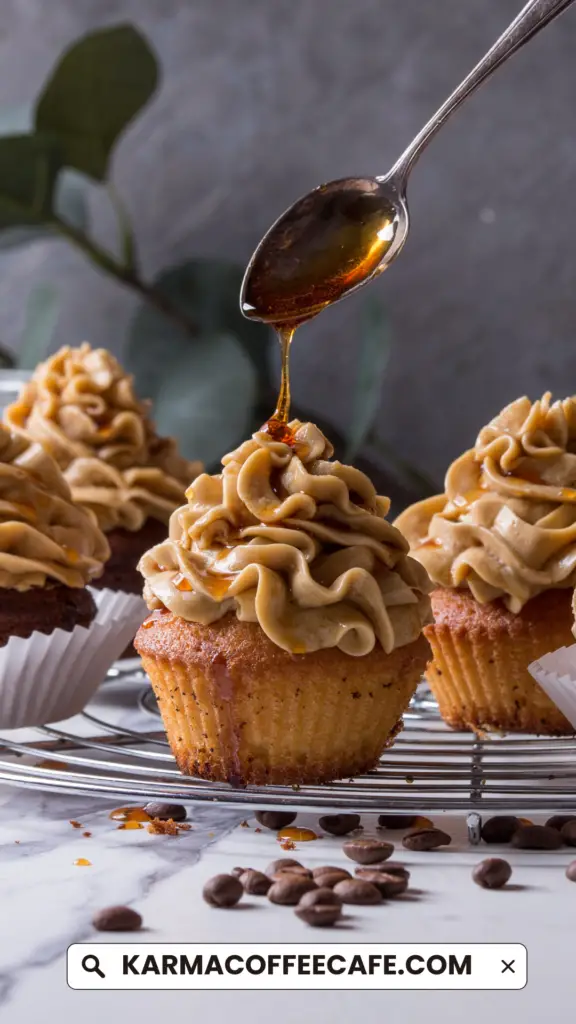
Fluffy Coffee Cupcakes are easy to make and packed with rich coffee flavor.
Topped with a creamy coffee buttercream, these cupcakes are perfect for any coffee lover.
It’s important not to over-bake them to preserve the coffee flavor.
Using powdered coffee or finely ground coffee granules ensures a strong coffee taste.
Adding a bit of salt enhances the coffee flavor without making the cupcakes bitter.
The use of light brown sugar adds a caramel hint, further enriching the coffee flavor.
Ingredients:
For the Cupcakes:
- 2 tablespoons coffee powder (or instant coffee granules ground in a spice grinder or mortar)
- 150 grams self-raising flour
- 165 grams soft light brown sugar
- 165 grams soft margarine (or butter)
- 3 medium eggs
- 1½ teaspoons milk
- ⅛ teaspoon salt
- 12 cupcake cases
For the Coffee Buttercream:
- 240 grams unsalted butter, room temperature
- 200 grams icing sugar
- 2 tablespoons hot water
- 1 tablespoon instant espresso powder (adjust to taste)
- Cocoa powder, for dusting
Directions:
1. Preheat the Oven:
- Preheat your oven to 160ºC (140ºC fan).
- Place your cupcake cases into a muffin tin.
2. Prepare the Cupcake Batter:
- Sift the self-raising flour (150 grams), coffee powder (2 tablespoons), and salt (⅛ teaspoon) into a large bowl.
- Add the remaining ingredients (3 medium eggs, 165 grams soft margarine, 165 grams soft light brown sugar, and 1½ teaspoons milk) and mix until fully combined, either by hand or using an electric mixer on low speed.
- Divide the mixture evenly between the cupcake cases.
3. Bake the Cupcakes:
- Bake for 18-20 minutes until a skewer inserted into the center comes out clean.
- Leave the cupcakes to cool in their tins for about 10 minutes, then move them to a wire rack to cool fully before decorating.
4. Prepare the Coffee Buttercream:
- Combine the icing sugar, hot water, and instant espresso powder in the bowl of a stand mixer. Mix until well combined and let it cool slightly.
- Add the room temperature butter and beat on high for 10 minutes, or until the mixture has doubled in volume and is light and fluffy.
- Transfer the buttercream to a piping bag fitted with a star-shaped tip and pipe swirls of buttercream on top of the cooled cupcakes.
- Dust with cocoa powder.
Frosting Options
- Classic Coffee Buttercream: Follow the recipe above for a creamy, coffee-flavored buttercream.
- Vanilla Buttercream: Substitute the coffee extract with vanilla extract for a classic vanilla buttercream.
- Chocolate Ganache: Top the cupcakes with a rich chocolate ganache for a mocha flavor.
15. Mocha Chip Blondies with Coffee Glaze
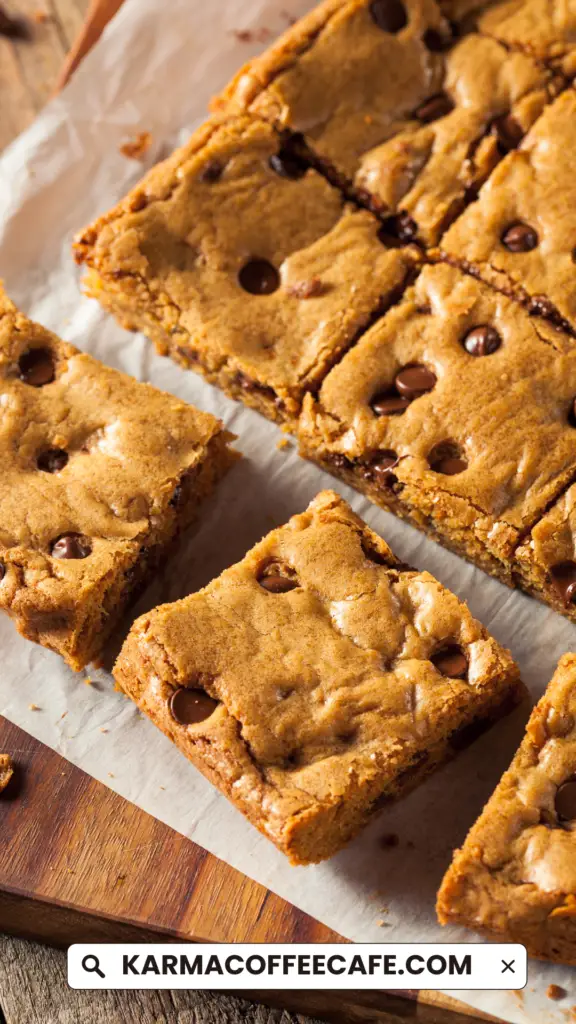
Mocha Chip Blondies with Coffee Glaze are dense, chewy bars featuring a rich coffee flavor both in the batter and the glaze.
These blondies are packed with milk chocolate chips, making them a delightful treat.
Perfect for holiday gifting or a quick dessert, the recipe is one-bowl easy and yields a large batch.
Ingredients:
For the Blondies:
- 1 1/2 sticks (12 tablespoons) unsalted butter, cut into 12 pieces
- 1 1/2 cups packed brown sugar
- 2 tablespoons brewed coffee, at room temperature
- 1 large egg, at room temperature
- 1 tablespoon vanilla extract
- 1 1/2 cups flour
- 1 1/2 teaspoons baking powder
- 3/4 teaspoon kosher salt
- 1 cup milk chocolate chips
For the Glaze:
- 1 1/2 cups confectioner’s sugar, plus extra if needed
- 3 tablespoons brewed coffee, at room temperature, plus extra if needed
Make the Blondies:
1. Prepare the Pan:
Grease a 9×13-inch baking pan and line it with parchment paper, ensuring the paper comes up the sides for easy removal.
2. Melt Butter and Sugar:
- Melt the butter and brown sugar in a medium heatproof bowl set over a pan of barely simmering water.
- Remove from heat, stir in the brewed coffee, and let cool to room temperature.
3. Combine Wet Ingredients:
Add the egg and vanilla extract to the cooled butter mixture, whisking until combined.
4. Mix Dry Ingredients:
- In a separate bowl, whisk together the flour, baking powder, and salt.
- Gradually add this dry mixture to the wet ingredients, folding with a rubber spatula until just combined.
- Fold in the chocolate chips.
5. Bake the Blondies:
- Transfer the batter to the prepared pan, smoothing the top with a small angled spatula. Bake for 20-22 minutes, until the top is crackled and shiny. A toothpick inserted into the center should come out with a few moist crumbs.
- Let cool completely in the pan on a wire rack. Once cooled, refrigerate until cold, preferably overnight for the cleanest cuts.
Make the Glaze:
1. Prepare the Glaze:
- In a clean bowl, whisk the confectioner’s sugar and brewed coffee together until smooth.
- Adjust with more sugar or coffee to achieve a thick yet pourable glaze.
2. Apply the Glaze:
- Using the parchment paper, lift the blondies from the pan and place them on a cutting board.
- Cut into 24 squares and separate slightly.
- Drizzle the glaze over the blondies and let it set completely before serving.
Glaze Preparation Tips:
- Ensure the brewed coffee is at room temperature to prevent the glaze from becoming too runny.
- For a thicker glaze, add more confectioner’s sugar, one tablespoon at a time, until the desired consistency is achieved.
- If the glaze is too thick, add a few drops of brewed coffee until it reaches a pourable consistency.
Notes:
To freeze, ensure the glaze is completely set.
Place the blondies in a single layer on a baking sheet and freeze, uncovered.
Once frozen, transfer them to an airtight container or a Ziploc bag.
They can be stored for up to one month.
Defrost in a single layer to maintain the appearance of the glaze.
16. Tiramisu Cupcakes
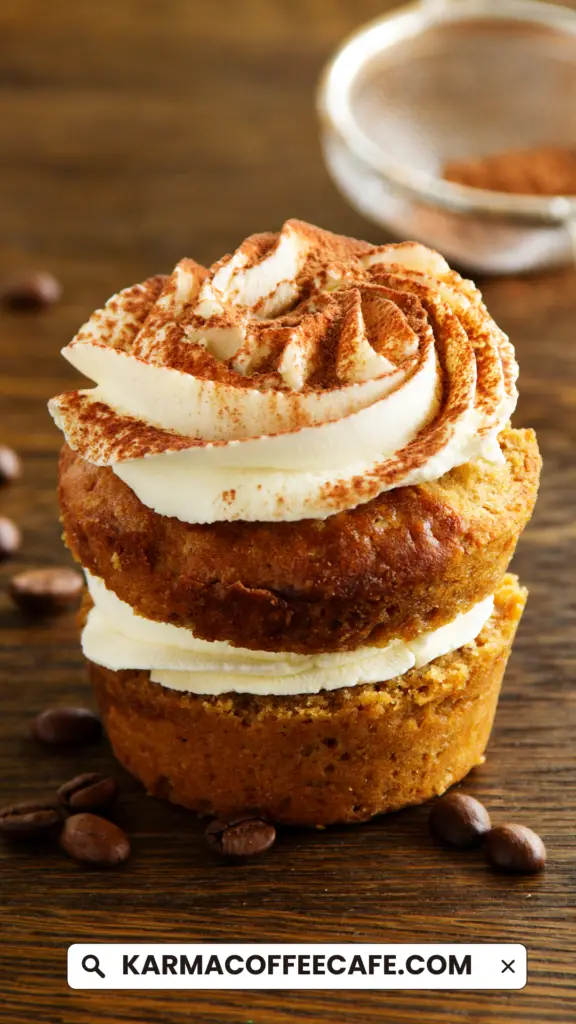
Tiramisu cupcakes are a delightful fusion of traditional tiramisu and classic cupcakes.
These treats are infused with coffee and topped with rich mascarpone cream.
The combination of moist cake and creamy frosting makes them a favorite for any occasion.
Ingredients:
Cakes:
- 2 3/4 cups all-purpose flour
- 2 1/2 teaspoons baking powder
- 3/4 teaspoon salt
- 1 3/4 cups granulated sugar
- 3/4 cup unsalted butter, softened
- 3 large eggs
- 1 tablespoon vanilla extract
- 1 cup whole milk
Coffee Liqueur Soak:
- 3 tablespoons coffee liqueur
- 2 tablespoons espresso powder
- 3 tablespoons sugar
- 3/4 cup hot coffee
Frosting:
- 2 cups heavy whipping cream
- 1 tablespoon cornstarch
- 2/3 cup confectioners’ sugar
- 1 cup mascarpone cheese
- 1 teaspoon vanilla extract
Garnish:
- Cocoa powder for dusting
- Chocolate shards or shavings
Instructions:
Make the Cakes:
- Preheat the oven to 350°F (175°C). Line two cupcake tins with paper liners.
- In a large bowl, whisk together the flour, baking powder, and salt.
- In the bowl of an electric mixer, beat the butter and sugar until light and fluffy.
- Beat in the eggs one at a time, then add the vanilla extract.
- Alternately add the flour mixture and milk to the butter mixture, beginning and ending with flour. Mix until just combined.
- Spoon the batter into the paper liners, filling each about 2/3 full.
- Bake for about 20 minutes, or until the cakes spring back when lightly touched.
- Let cool completely on a wire rack.
Make the Coffee Soak:
- Combine the coffee liqueur, espresso powder, sugar, and hot coffee in a large bowl. Stir until the sugar is dissolved.
- Remove the paper liners from the cupcakes and quickly dip the bottoms into the coffee soak. Place the dipped cakes on a serving platter or in decorative cupcake papers.
Make the Frosting:
- In the bowl of an electric mixer, beat the heavy whipping cream until soft peaks form.
- Add the cornstarch and confectioners’ sugar, and beat until stiff peaks form.
- Add the mascarpone cheese and vanilla extract, and beat until smooth and thick.
- Transfer the frosting to a piping bag fitted with a large French pastry tip. Pipe the frosting onto the cooled cupcakes in a swirling motion.
Garnish:
- Dust each cupcake with cocoa powder using a fine mesh strainer.
- Top with chocolate shards or shavings for an elegant finish.
Storage
Store the cupcakes loosely covered in plastic wrap in the refrigerator.
Presentation Tips
- For a more elegant presentation, use decorative cupcake wrappers and top each cupcake with a chocolate-covered espresso bean.
- You can also create beautiful chocolate shards by melting chocolate and spreading it thinly on a baking sheet. Once it hardens, break it into pieces and use them to decorate the cupcakes.
- If you want to add a touch of color, sprinkle a few edible gold flakes over the tops.
17. Nutella Coffee Ice Cream
Nutella Coffee Ice Cream is a delightful no-churn dessert combining the rich flavors of coffee and Nutella.
This creamy treat is perfect for coffee lovers and easy to make without an ice cream machine.
The Nutella swirl adds a deliciously sweet twist to the robust coffee base, making it an indulgent treat.
Ingredients:
- 1 packet (3g) instant coffee
- 1/4 cup (59ml) hot water
- 2 cups (474ml) cold heavy whipping cream
- 1 can (14 ounces) sweetened condensed milk
- 1/2 cup (148g) Nutella
Instructions:
1. Prepare Coffee Mixture:
- Dissolve the instant coffee in 1/4 cup hot water.
- Stir well and let it cool for about 10 minutes.
2. Whip Cream:
- In a large mixing bowl, beat the cold heavy whipping cream until stiff peaks form.
- This should take about 3-4 minutes using an electric mixer on medium-high speed.
- Set aside.
3. Combine Ingredients:
- In another large bowl, mix the cooled coffee mixture with the sweetened condensed milk.
- Gently fold in the whipped cream, ensuring you do not deflate the mixture.
4. Add Nutella:
- Warm the Nutella in the microwave for about 20 seconds to make it more pourable.
- Drizzle it into the coffee and cream mixture while folding it in gently.
- The goal is to create swirls of Nutella, not to mix it completely.
5. Freeze:
- Transfer the mixture into a freezer-safe container.
- Drizzle a bit more Nutella on top for decoration if desired.
- Cover the container and freeze for at least 4 hours or overnight for best results.
Notes:
- For a richer flavor, you can use freshly brewed coffee in place of instant coffee. Brew a strong coffee and let it cool before mixing it with the sweetened condensed milk.
- The ice cream can be stored in an airtight container in the freezer to maintain its freshness.
Serving Suggestions
Nutella Coffee Ice Cream is versatile and can be enjoyed on its own or paired with various toppings and accompaniments.
Here are some serving ideas:
- With Chocolate Shavings: Sprinkle some dark chocolate shavings on top for added texture and a deeper chocolate flavor.
- Drizzled with Caramel Sauce: Enhance the sweetness by drizzling caramel sauce over the ice cream.
- Topped with Whipped Cream: Add a dollop of whipped cream for extra creaminess.
- Served in a Waffle Cone: Enjoy the ice cream in a waffle cone for a classic treat.
- With Fresh Berries: Add a handful of fresh raspberries or strawberries for a fruity contrast.
18. No-Churn Coffee Ice Cream
No-Churn Coffee Ice Cream is an easy-to-make, delicious dessert that doesn’t require an ice cream maker.
With rich coffee flavor and a creamy texture, it’s a perfect treat for coffee lovers.
Ingredients:
- 300 millilitres double cream
- 175 grams condensed milk
- 2 tablespoons instant espresso powder
- 2 tablespoons espresso liqueur
Instructions:
1. Prepare the Mixture:
- Whisk together the double cream, condensed milk, instant espresso powder, and espresso liqueur until soft peaks form.
- The mixture should be airy and have a caffe-latte color.
2. Freeze the Mixture:
- Transfer the mixture into two 500ml / 1-pint airtight containers.
- Freeze for at least 6 hours or overnight.
3. Serve:
Serve the ice cream straight from the freezer for the best texture and flavor.
Tips:
- For an American adaptation, use heavy cream or whipping cream.
- Whisk the cream first until soft peaks form before adding other ingredients.
- Best if eaten within a week but can be stored for up to a month in the freezer.
19. Dulce de Leche Mocha Cupcakes
Dulce de Leche Mocha Cupcakes are decadent chocolate cupcakes filled with rich dulce de leche and topped with a smooth Dulce de Leche Mocha Swiss Meringue Buttercream.
These cupcakes are perfect for special occasions and are sure to impress with their delightful blend of flavors.
Ingredients:
Chocolate Cupcakes:
- 1 1/2 cups all-purpose flour (190 grams, 6.75 oz)
- 1/4 cup unsweetened cocoa powder (31 grams, 1.125 oz)
- 1 tsp baking soda
- 1/2 tsp baking powder
- 1/2 tsp fine sea salt
- 1/2 cup canola oil (107 grams, 3.8 oz)
- 1 cup brewed coffee (240 ml)
- 1 tbsp white vinegar
- 2 tsp vanilla extract
- 1 cup granulated sugar (200 grams, 7 oz)
Dulce de Leche:
1 14 oz. can condensed milk (or 1 1/4 cups store-bought dulce de leche)
Dulce de Leche Mocha Swiss Meringue Buttercream:
- 2 oz chopped chocolate or chocolate chips (56 grams, 1/3 cup)
- 20 tbsp unsalted butter, room temperature (283 grams, 10 oz)
- 4 large egg whites
- 1 cup sugar (200 grams, 7 oz)
- 1/4 cup Dulce de Leche (store-bought or homemade)
- 1 tbsp instant espresso powder
Instructions:
Chocolate Cupcakes:
- Preheat the oven to 350°F (175°C). Line a cupcake pan with liners or grease it with butter and flour.
- Sift the flour, cocoa powder, baking soda, baking powder, and salt together in a large bowl.
- In another bowl, mix the oil, coffee, vinegar, vanilla, and sugar until well combined.
- Pour the dry mixture over the wet ingredients and whisk briefly until incorporated.
- Distribute the batter evenly in the cupcake pan. Bake for 15-20 minutes, or until a toothpick inserted in the center comes out clean.
- Remove from the oven and let cool completely.
Dulce de Leche:
- To make homemade dulce de leche, place a sealed can of condensed milk in a pressure cooker with enough water to cover it plus at least 2 inches.
- Bring the water to a boil and cook under pressure for 35 minutes.
- Let the pressure release naturally and allow the can and water to cool completely before removing and opening the can.
- Transfer the dulce de leche to a container and refrigerate until cold and firm.
Dulce de Leche Mocha Swiss Meringue Buttercream:
- Remove the butter from the fridge 1 to 2 hours before making the buttercream to allow it to reach room temperature.
- Melt the chocolate or chocolate chips in a small bowl by microwaving in 15-second intervals, stirring in between. Let it cool until no longer warm.
- Place the egg whites and sugar in a heatproof bowl. Place the bowl over a pot of simmering water.
- Whisk the egg whites and sugar until they reach 140°F (60°C), melting the sugar granules and making the egg whites safe to consume.
- Transfer the mixture to a mixer bowl and whip with the whisk attachment for about 2 minutes at medium speed until the mixture looks white and thicker. Increase the speed to high and whip until fluffy and doubled in size, achieving stiff peaks (5-10 minutes).
- Start adding the softened butter one slab at a time, waiting for each piece to be incorporated before adding the next.
- Once all the butter is incorporated, add the dulce de leche, melted and cooled chocolate, and espresso powder to the buttercream. Beat for another minute until fully combined.
Assembly:
- Once the cupcakes have cooled, use a spoon to remove the center of each cupcake.
- Place the dulce de leche in a piping bag and pipe it into the center of each cupcake, or spoon a small amount (about 2 tsp) into the center.
- Top the cupcakes with the piece of cake removed from the middle.
- Place the Dulce de Leche Mocha Swiss Meringue Buttercream in a piping bag fitted with the tip of your choice and pipe it on top of the cupcakes.
- Optionally, top the cupcakes with crispearls or chocolate shavings.
Storage:
The cupcakes can be stored in the fridge for up to 5 days, well covered.
Decoration Ideas
- For an elegant finish, sprinkle cocoa powder lightly over the frosted cupcakes.
- Top each cupcake with a few chocolate-covered espresso beans for an added touch of sophistication.
- Use chocolate curls or shavings to create a visually appealing garnish.
20. Coffee Ice Cream Cake

The Coffee and Fudge Ice Cream Cake is a delightful, multi-layered dessert that combines the rich flavors of chocolate, coffee, and vanilla ice cream.
Layered with graham crackers and a decadent homemade fudge sauce, this cake is an easy-to-make summer treat that’s perfect for any occasion.
It’s topped with whipped cream, cocoa powder, and chocolate shavings, making it both visually appealing and delicious.
Ingredients:
Fudge Sauce:
- 1 cup unsweetened cocoa powder
- 1/2 cup heavy cream
- 1/2 cup honey (or maple syrup as a substitute)
- 2/3 cup granulated sugar
- 1 stick (8 tablespoons) salted butter
- 1 teaspoon vanilla extract
- Pinch of salt
Cake:
- 1 pint chocolate ice cream
- 1 pint coffee chip ice cream
- 1 pint vanilla ice cream
- 18-20 sheets graham crackers (or Oreo cookies as a substitute)
- 1 cup heavy cream
- 1 tablespoon powdered sugar
Instructions:
Make the Fudge Sauce:
- In a medium saucepan over medium heat, combine cocoa powder, cream, honey, sugar, and butter. Stir constantly for 5 minutes until the butter and chocolate are melted and the sauce is smooth.
- Remove from heat, stir in the vanilla, and add a pinch of salt. Let cool for 10 minutes.
Assemble the Cake:
- Line an 8-inch square baking pan with parchment paper.
- Press the chocolate ice cream into the bottom of the pan.
- Top with a layer of graham crackers, then about 1/3 cup of fudge sauce. Freeze for 15 to 30 minutes.
- Remove from the freezer, add the coffee ice cream, another layer of graham crackers, and then 1/3 cup fudge sauce. Freeze for another 15 to 30 minutes.
- Remove from the freezer, add the vanilla ice cream, and then the final layer of graham crackers. Cover and freeze for 6 hours or overnight for best results.
Prepare to Serve:
- Keep the remaining fudge sauce in the fridge. When ready to serve, warm the fudge sauce for 30 seconds to 1 minute.
- Run a knife around the edges of the cake to loosen it, then invert the cake onto a platter and remove the parchment paper.
- Pour the warmed fudge sauce over the cake and freeze for an additional 5 minutes.
Add the Whipped Cream:
- Whip the heavy cream and powdered sugar with an electric mixer until soft peaks form.
- Dollop the whipped cream over the cake.
- Dust with cocoa powder and top with chocolate shavings if desired.
Serve:
Slice and serve immediately. Enjoy!
Layering Techniques
- Make sure each layer of ice cream is smooth and even before adding the next layer.
- Allow each layer to freeze slightly before adding the next to prevent mixing of the layers.
- Use a knife to run along the edges before inverting the cake to help release it smoothly.
21. Coffee Panna Cotta
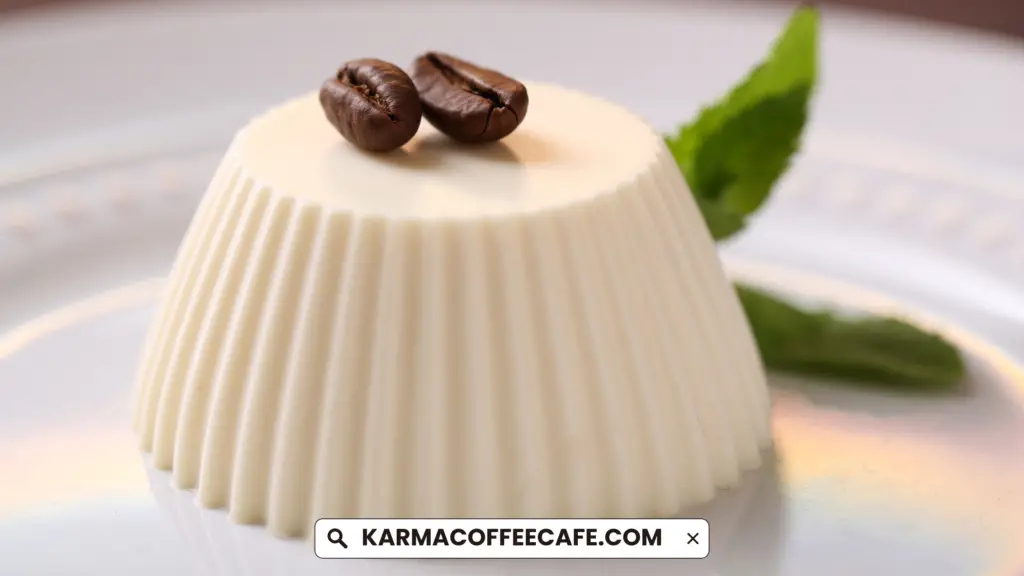
Coffee panna cotta is a rich, creamy dessert that looks sophisticated yet is easy to make.
This Italian classic, meaning “cooked cream,” is made with gelatin, giving it a smooth, custard-like consistency.
It requires several hours to set in the refrigerator, making it a perfect make-ahead dessert.
Ingredients:
- 3 tablespoons (45 ml) cold water
- 2 ¼ teaspoons (7 g) unflavored powdered gelatin
- 1 cup (240 ml) heavy cream
- ½ cup (120 ml) whole milk
- ½ cup (120 ml) strong brewed coffee (or 1 tablespoon coffee granules/powder dissolved in ½ cup water)
- ¼ cup (50 g) granulated sugar
- 1 teaspoon pure vanilla extract
Coffee Syrup (optional):
- ½ cup (120 ml) brewed coffee (or 1 teaspoon coffee granules/powder dissolved in ½ cup water)
- 1-2 tablespoons granulated sugar
- 1 tablespoon Kahlua or another coffee liqueur (optional)
Instructions:
Bloom the Gelatin:
- Place water in a small bowl and sprinkle gelatin over the surface in a single layer.
- Let stand for 5-10 minutes to soften.
Prepare the Panna Cotta Mixture:
- In a medium saucepan, heat the heavy cream, milk, coffee, sugar, and vanilla over medium heat. Bring to a boil just until the sugar dissolves, then remove from heat.
- Stir in the softened gelatin and whisk until smooth and fully dissolved. If the gelatin hasn’t fully dissolved, return the saucepan to the stove and heat gently over low heat, stirring constantly. Do not let the mixture boil.
Set the Panna Cotta:
- Pour the mixture into 4-6 individual serving dishes.
- Refrigerate for at least 4 hours, or until completely set.
Make the Coffee Syrup (optional):
- In a small saucepan, heat the coffee and sugar over medium heat, bringing it to a boil until the sugar dissolves. Remove from heat.
- Add Kahlua (if using) and mix until combined. Transfer the syrup to a small bowl and refrigerate until serving.
Serving Suggestions
- Just before serving, add 1-2 tablespoons of the syrup on top of each panna cotta.
- Serve with extra syrup on the side for those who prefer more sweetness.
Tips:
- Panna cotta can be stored in the refrigerator for up to 3 days, covered with plastic wrap.
- For a dairy-free version, substitute the heavy cream and milk with full-fat coconut milk or coconut cream.
- To avoid splatters and ensure a clean pour, use a piping bag to transfer the panna cotta mixture into serving glasses.
Tips for Perfect Coffee Desserts
Creating coffee desserts can be a delightful experience if done correctly.
Here are some tips to ensure your coffee desserts turn out perfect every time:
Importance of Quality Coffee
Quality coffee is crucial for achieving the best flavor in your coffee desserts.
Use freshly brewed coffee, high-quality instant espresso powder, or freshly ground coffee beans to enhance the taste.
Poor-quality coffee can result in a bitter or flat flavor, affecting the overall dessert experience.
Balancing Coffee Flavors
Balancing the coffee flavor with other ingredients is essential.
Too much coffee can overwhelm the dessert, while too little can make it insipid.
Adjust the coffee amount based on the desired intensity and the other flavors in the recipe.
For instance, pairing coffee with chocolate can create a rich and harmonious blend, while adding vanilla or caramel can mellow and enhance the coffee notes.
Storage and Preservation Tips
Proper storage ensures your coffee desserts stay fresh and flavorful.
Here are some tips:
- Refrigeration: Most coffee desserts like panna cotta, ice cream cakes, and tiramisu should be stored in the refrigerator. Cover them with plastic wrap to prevent them from absorbing other odors.
- Freezing: For desserts like ice cream, ensure they are stored in airtight containers to prevent freezer burn. Allow them to thaw slightly at room temperature before serving to restore their creamy texture.
- Shelf Life: Consume coffee desserts within their recommended shelf life. Panna cotta can last up to 3 days in the fridge, while ice cream can be stored for up to a month.
Health Considerations
Understanding the nutritional content of your coffee desserts can help you make informed choices.
Coffee desserts can vary widely in their nutritional profiles, but here are some general guidelines:
- Calories: Coffee desserts can be high in calories due to ingredients like cream, sugar, and chocolate. For example, a serving of coffee panna cotta might contain around 200-300 calories.
- Fat: These desserts often contain significant amounts of fat, especially saturated fat, from cream and butter. Moderation is key to maintaining a balanced diet.
- Sugar: High sugar content is common in desserts, contributing to the overall calorie count. Consider reducing sugar or using alternatives like honey or maple syrup to control sugar intake.
Moderation Tips
Enjoying coffee desserts in moderation is essential for maintaining a healthy lifestyle.
Here are some tips:
- Portion Control: Serve small portions to enjoy the flavors without overindulging. Mini desserts or single servings can help control intake.
- Balance with Diet: Balance your dessert consumption with a diet rich in fruits, vegetables, and lean proteins. This helps ensure you get a variety of nutrients.
- Healthier Alternatives: Experiment with healthier ingredients, such as using Greek yogurt instead of cream, or natural sweeteners instead of refined sugar. This can reduce the calorie and sugar content without sacrificing flavor.
Conclusion
Coffee desserts bring a delightful twist to traditional sweets, combining rich flavors and creamy textures.
These recipes offer an exciting way to enjoy coffee in a variety of forms.
Try out these recipes and experience the joy of making and sharing these delicious treats.
Don’t forget to share your feedback and photos with us—we’d love to see your creations!
Frequently Asked Questions
Can you make these desserts caffeine-free?
Yes, you can make these desserts caffeine-free by using decaffeinated coffee or espresso.
The flavor remains rich and delicious without the caffeine.
What type of coffee works best in desserts?
Instant espresso powder is often the best choice for desserts due to its intense and concentrated flavor.
It dissolves easily and provides a strong coffee taste without adding extra liquid.
However, brewed coffee can also be used, especially in recipes where the liquid content is adjustable.
Ensure the coffee is strong to achieve a pronounced coffee flavor.
Can you substitute instant coffee with brewed coffee?
Yes, you can substitute instant coffee with brewed coffee in most recipes.
Use a strong brew to ensure the flavor is noticeable.
Adjust the liquid content in the recipe if necessary to maintain the desired consistency.
For instance, reduce other liquids slightly if you’re adding brewed coffee.