Are you having trouble with your Breville grinder? As one of the most popular brands in the coffee grinder market, Breville grinders are known for their high-quality performance and durability.
However, like any other appliance, Breville grinders can encounter problems from time to time.
In this blog post, we’ll provide you with some common Breville grinder troubleshooting tips that will help you diagnose and fix the issues you may be experiencing.
Whether you’re dealing with jammed grinders, malfunctioning settings, or other issues, we’ve got you covered. Keep reading to learn more!
Breville Grinder Not Grinding Correctly
Is your Breville grinder failing to grind your coffee beans properly? It can be frustrating when your morning routine is disrupted due to an appliance malfunction.
Several factors could be causing the problem, and it’s essential to identify the root cause before attempting any fixes.
In this section, we’ll explore some possible reasons why your Breville grinder won’t grind.
Ensure The Hopper Is Secured
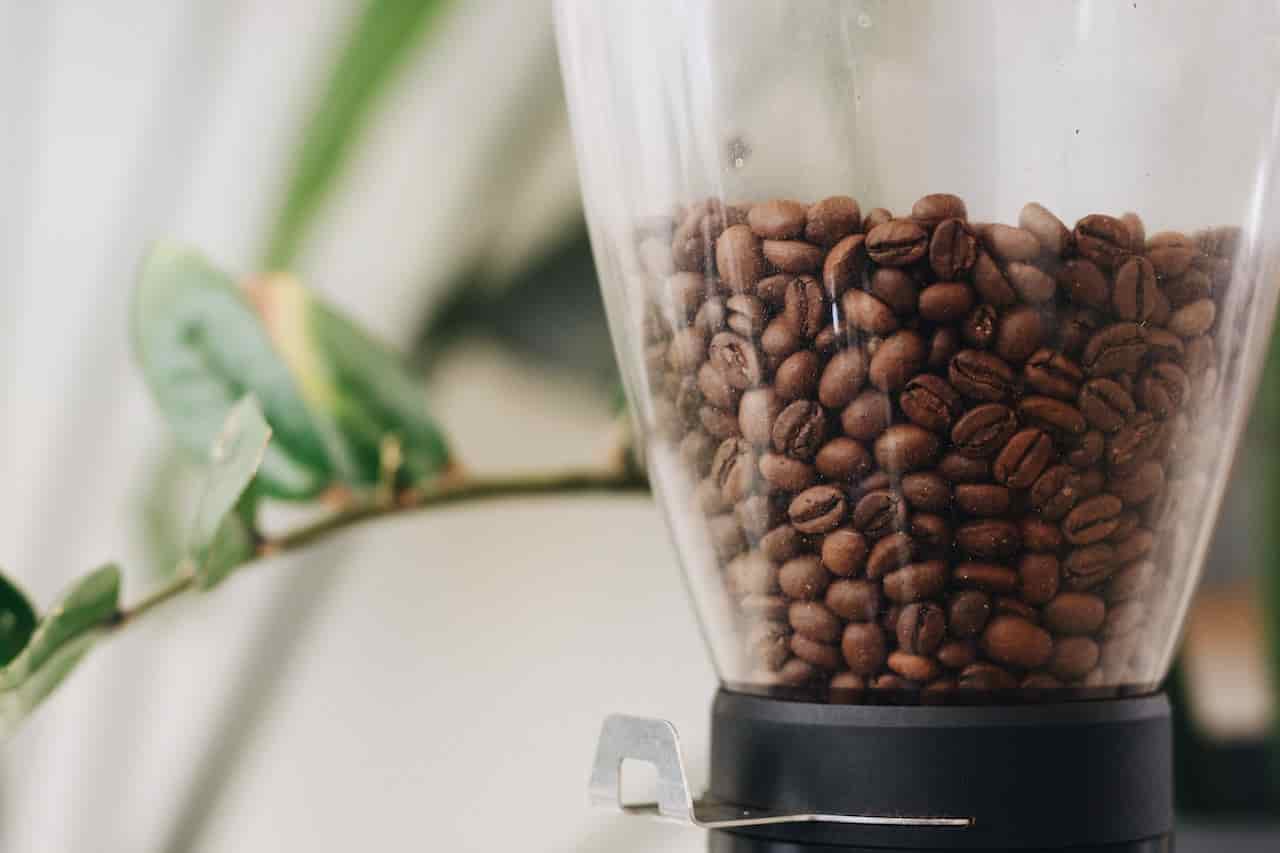
If your Breville grinder is not grinding, one of the first things you should check is the hopper.
The hopper is the part of the grinder that holds the coffee beans, and if it’s not installed correctly or if there’s an issue with the beans themselves, it can cause the grinder to malfunction.
First, make sure that the hopper is securely in place on top of the grinder.
If it’s loose or not attached correctly, the grinder will not turn on.
This is a safety feature that is present in the Breville Smart Grinder Pro so before moving onto any further steps ensure that the hopper is secure.
Clogged grinder burrs
The most common reason why your Breville grinder may not be grinding is clogged grinder burrs.
Over time, coffee oils and debris can build up and create a barrier that prevents the beans from being properly ground.
You can check if this is the issue by removing the hopper and inspecting the burrs for any visible blockages.
If you notice any buildup, clean the burrs with a brush or a specialized grinder cleaning product.
Improper grind size settings
Another reason why your Breville grinder may not be grinding could be due to incorrect grind size settings.
Each coffee brewing method requires a specific grind size to extract the perfect flavor and aroma from the beans.
Make sure you have selected the right grind size for your brewing method.
Adjust the settings and test again to see if it resolves the problem.
Jammed grinder due to foreign objects
Sometimes, foreign objects such as stones or metal can accidentally find their way into the bean hopper, causing the grinder to jam.
If you suspect this might be the issue, unplug the machine and remove the hopper to check for any foreign objects.
Use a flashlight to look inside the grinder chamber for any visible signs of obstruction.
Remove any objects and reassemble the grinder before testing it again.
Breville Grinder Is Making A Lot Of Noise
Is your Breville grinder making an excessive amount of noise during operation? A coffee grinder that’s louder than usual can be a sign of a problem that needs to be addressed.
In this section, we’ll explore some possible reasons why your Breville grinder is making a lot of noise and what you can do to fix it.
Grinder burrs need to be cleaned or replaced
One of the most common reasons why a Breville grinder might make excessive noise is due to the burrs being dirty or worn out.
If the burrs are dirty, they may need to be cleaned using a specialized cleaning product or brush. If they’re worn out, it may be time to replace them.
You can check for signs of wear and tear by inspecting the burrs for any chips, cracks, or other signs of damage.
Loose or misaligned parts
If your Breville grinder is making a rattling noise, it may be due to loose or misaligned parts.
Check the grinder’s components for any loose screws or bolts, and tighten them if necessary.
Additionally, make sure that all parts are correctly aligned and in their proper place.
The grinder motor is failing
If your Breville grinder is making a high-pitched or whining noise, it may be due to a failing motor. In this case, the motor may need to be replaced.
Contact Breville customer support or a professional repair technician to diagnose and repair the issue.
Incorrect Grind Setting
In addition to the previously mentioned solutions, another way to fix a Breville grinder that is making a lot of noise is by loosening the grind setting.
If the grinder is set to a very fine grind size, it can cause the motor to work harder, resulting in a loud noise.
This is especially true if you’re grinding dark roast beans, which tend to be oily and sticky.
To fix this issue, try loosening the grind setting and see if the noise reduces.
You can gradually adjust the settings until you find the right balance between grind size and noise level.
Additionally, make sure you’re not overloading the bean hopper with too many beans, as this can also put a strain on the motor and increase the noise level.
Breville Grinder’s Start Button Is Not Functioning
If the start button on your Breville grinder isn’t working, there could be several reasons why.
The Hopper Isn’t Secured
To start using the Smart Grinder Pro, it’s essential to ensure that the bean hopper is correctly attached to the machine.
If the hopper isn’t locked in place, the grinder won’t start, and a message saying “Please lock hopper” will be displayed on the screen.
To fix this issue, make sure that the hopper is correctly attached, and turn the dial to lock it in place.
Overheating
If the hopper is correctly attached, but the grinder still won’t start, it may be due to overheating.
The Smart Grinder Pro has a thermal safety shut-off switch that prevents it from running when it gets too hot.
In this case, try unplugging the machine and allowing it to cool down for at least 20 minutes before attempting to use it again.
This will ensure that the thermal safety switch is reset and the grinder can operate safely.
Other Reasons Why Breville Grinder Start Button Isn’t Working
Faulty Switch
Another possible reason for a non-functioning start button is a faulty switch.
If the switch is broken or has worn out over time, it may not be able to make proper contact, resulting in a failure to start the grinder.
In this case, the switch may need to be replaced, which should be done by a professional repair technician.
Loose Connections
Another reason why the start button may not be working is due to loose connections.
Over time, the wiring inside the grinder can become loose or disconnected, which can prevent the grinder from starting.
To fix this issue, you can try opening up the grinder and checking for any loose wires.
If you’re not comfortable doing this, it’s best to seek the help of a professional technician.
Electrical Issues
If the switch and connections appear to be functioning correctly, the issue could be due to electrical problems.
This can occur if there is a problem with the power supply or if the electrical components inside the grinder are damaged.
In this case, it’s best to have the grinder inspected by a professional technician to determine the root cause of the issue and the best course of action to take.
What Is An Impeller On A Breville Grinder?
An impeller on a Breville grinder refers to a mechanical issue that can occur with the grinder’s motor.
The impeller is a small, fan-like component that is responsible for creating suction to move the coffee beans through the grinder’s burrs.
Over time, the impeller can wear down or become damaged, which can cause the grinder to malfunction.
Symptoms Of A Worn Impeller
There are several symptoms that can indicate a worn impeller on a Breville grinder. Some of these symptoms include:
- Slower grinding times: A worn impeller may result in a slower grinding process, as the suction created by the impeller is reduced. This can cause the grinder to take longer than usual to grind the coffee beans.
- Incomplete grinding: If the impeller is worn, it may not be able to move the coffee beans through the burrs effectively, leading to incomplete grinding. This can result in unevenly ground coffee or large pieces of beans in the coffee grounds.
- Increased noise: A worn impeller can cause the grinder to produce more noise than usual, as the motor has to work harder to grind the coffee beans.
- Overheating: The increased strain on the motor caused by a worn impeller can cause the grinder to overheat, which can be dangerous and cause the grinder to malfunction.
If you notice any of these symptoms, it’s important to have your Breville grinder inspected by a professional technician.
They can diagnose the issue and determine if the impeller needs to be repaired or replaced to ensure that your grinder operates safely and effectively.
Breville Grinder Maintenance
Maintaining and caring for your Breville grinder is essential to ensure that it operates at peak performance and lasts for as long as possible.
Here are some of the reasons why regular maintenance and care are so important:
- Consistent grind quality: Over time, the burrs in your grinder can become dull or clogged with coffee oils and debris, which can lead to inconsistent grind quality. Regular cleaning and maintenance can help ensure that the burrs remain sharp and free of buildup, resulting in more consistent and flavorful coffee.
- Longevity: By taking care of your Breville grinder and performing regular maintenance tasks, you can extend its lifespan and prevent premature breakdowns or malfunctions.
- Safety: Neglecting maintenance and care can lead to safety hazards, such as overheating or electrical issues. Regular cleaning and inspection can help identify potential safety issues before they become serious problems.
- Cost-effective: Investing a small amount of time and effort in maintaining your grinder can save you money in the long run by preventing costly repairs or replacements.
To care for your Breville grinder, it’s important to follow the manufacturer’s instructions for cleaning and maintenance, which may include tasks such as regular burr cleaning, descaling, and lubrication.
It’s also a good idea to inspect your grinder periodically for signs of wear or damage, such as worn burrs or a damaged impeller.
By taking a proactive approach to maintenance and care, you can enjoy delicious coffee from your Breville grinder for years to come.
Conclusion
Troubleshooting issues with your Breville grinder may seem daunting at first, but by following some simple steps, you can often diagnose and fix the problem on your own.
Checking the hopper, adjusting the grind setting, and cleaning the burrs are all easy tasks that can help get your grinder back up and running smoothly.
If these solutions don’t work, a professional technician can help diagnose more complex issues, such as a worn impeller or motor problems.
However, the best way to avoid these issues altogether is by performing regular maintenance and care on your grinder.
By taking the time to clean and inspect your Breville grinder regularly, you can enjoy delicious coffee and extend the lifespan of your machine.
FAQ’s
What causes a coffee grinder to stop working?
Several factors can cause a coffee grinder to stop working, including a clogged or jammed burr, worn-out blades or burrs, a faulty motor, or an electrical issue.
In some cases, a coffee grinder may also stop working due to overheating or overuse.
Why is my Breville not grinding fine enough?
There are several reasons why a Breville grinder may not be grinding fine enough.
One common cause is a clogged or jammed burr.
Another possibility is that the grind setting is not adjusted correctly.
Additionally, worn-out burrs or blades can also lead to a coarser grind.
Why is my Breville coffee grinder not grinding?
The primary reason for a Breville grinder not grinding could be a clog or jam in the machine.
To resolve this, start by checking the hopper’s chute for any blockages.
Occasionally, a coffee bean may get stuck in the chute, hindering the flow of other beans from the hopper into the grinding chamber.
What is the best grind number for Breville?
It’s advisable to begin with a grind level of 14 and modify it to suit your preferences.
You can adjust the grind level by turning the grind dial located on the side of the machine.
For a milder taste, move the dial toward the coarse setting, while a richer flavor can be achieved by turning it towards the fine setting.
How often do you clean a Breville grinder?
It is recommended to clean your Breville grinder regularly to ensure optimal performance and extend the life of the machine.
The frequency of cleaning depends on the usage of the grinder.
For light use, it is suggested to clean it once a month, while for heavy usage, it is best to clean it every two weeks or more frequently if necessary.
It is also essential to clean the grinder after switching to a different type of coffee bean to prevent flavor contamination.