There’s something truly special about crafting your own espresso at home—it’s not just about the rich, aromatic brew but also the satisfaction that comes from mastering this elegant coffee art form.
However, to truly capture the essence of a perfect espresso, it’s crucial to get acquainted with your espresso machine.
Understanding its quirks and capabilities is the first step towards ensuring that each shot you pull is as mesmerizing as the last.
So, let’s dive into the heart of home espresso making, where every sip tells a story of flavor, craftsmanship, and the warm embrace of a well-made coffee.
Understanding Your Espresso Machine
Like a trusted companion, your espresso machine is the key to unlocking the full potential of your coffee beans.
Let’s explore the different types of espresso machines and the crucial components that make up these remarkable devices.
Types of Espresso Machines
Manual Espresso Machines
For the purists and enthusiasts, manual machines offer the most hands-on approach to espresso making.
They require you to manually pump the water through the coffee grounds, giving you complete control over the pressure and extraction process.
It’s a method that demands practice and precision but rewards you with unparalleled satisfaction and a deep connection to the brewing process.
Semi-Automatic Espresso Machines
These machines strike a beautiful balance between control and convenience.
While you still grind the coffee and pack the portafilter, the machine takes over the task of pumping the water.
This allows you to focus on the nuances of tamping and timing, making it a popular choice for both beginners and experienced baristas who appreciate a blend of hands-on involvement and reliability.
Super-Automatic Espresso Machines
For those who love their espresso with a side of convenience, super-automatic machines are the way to go.
These marvels of technology handle everything from grinding the beans to frothing the milk, all at the touch of a button.
They’re perfect for busy mornings or when you’re entertaining guests and want to ensure everyone gets their coffee fix without delay.
They’re also typically the most expensive.
Key Components of an Espresso Machine
Portafilter
This is where the magic begins.
The portafilter holds the ground coffee and is locked into the group head before brewing.
It’s essential to get the right amount of coffee and tamp it properly to ensure an even extraction.
Group Head
Attached to the machine, the group head is where the portafilter is locked in place.
It’s responsible for distributing hot water evenly through the coffee grounds.
A clean and well-maintained group head is crucial for a consistent and delicious espresso.
Steam Wand
Milk-based espresso drinks wouldn’t be the same without the steam wand.
This component lets you steam and froth milk to creamy perfection, creating the soft, velvety texture that’s essential for lattes and cappuccinos.
Water Reservoir
The source of life for your espresso, the water reservoir should be filled with fresh, clean water to ensure the best taste.
Some machines are plumbed directly into a water line, offering convenience and an endless supply of water for your brewing needs.
Pressure Gauge
This often-overlooked component is key to monitoring the pressure applied during extraction.
Ideal espresso extraction occurs around 9 bars of pressure, and the gauge helps you keep an eye on this critical factor.
Step #1: Preparing the Espresso Machine
Before you can start crafting your perfect espresso, your machine needs to be properly prepared.
This initial setup is not just about turning on a switch; it’s about ensuring your machine is fully primed and ready to extract the best possible flavors from your coffee.
Let’s walk through the steps to get your espresso machine warmed up and ready to go.
Turning On and Heating Up the Machine
The first step is as simple as it sounds but as crucial as any in the espresso-making process: turning on your machine.
However, this isn’t just about flipping a switch.
Most espresso machines need some time to reach the optimal temperature for brewing.
This can vary widely depending on the type of machine you have.
For instance, a smaller, single-boiler machine might take just a few minutes, while a larger, more robust machine could need up to 15-20 minutes to properly heat up.
During this warm-up phase, the machine is not only heating the water needed for brewing but also ensuring that the entire system, from the group head to the portafilter, is at a consistent temperature.
This uniformity is key to achieving a balanced extraction, as temperature fluctuations can significantly affect the taste of your espresso.
Priming the Machine and Ensuring It’s Ready for Use
Once your machine has reached its brewing temperature, it’s time to prime it.
Priming is essentially a pre-brewing process that helps ensure your machine is fully ready to make espresso.
This involves running water through the group head without any coffee in the portafilter.
Priming helps to remove any old coffee residues and ensures that the water flowing through your machine is fresh and at the correct temperature.
To prime your machine, simply lock the empty portafilter into the group head and start a brew cycle, allowing the hot water to run through for a few seconds.
This step also helps to heat the portafilter, which is crucial for maintaining the temperature during the actual brewing process.
A cold portafilter can shock the coffee grounds and affect the brewing dynamics, leading to under-extraction.
Step #2: Selecting and Preparing Coffee Beans
The heart of a mesmerizing espresso lies in the beans you choose and how you prepare them.
This step is where your personal taste preferences come into play, and the journey from bean to espresso becomes truly magical.
Importance of Fresh, High-Quality Beans
Freshness is the soul of a great espresso.
Coffee beans are at their peak flavor just days after roasting, with a window of optimum freshness lasting up to a month.
Using fresh beans ensures that the essential oils and aromatic compounds are still vibrant, and ready to be extracted into your cup.
High-quality beans, sourced from reputable roasters, can make a world of difference.
These beans are often grown in optimal conditions and harvested with care, ensuring each bean is packed with flavor.
Remember, the journey to a perfect espresso starts long before the beans reach your grinder—it begins with the care and passion of those who cultivate and roast them.
How to Choose the Right Espresso Beans
Choosing the right espresso beans can seem daunting with so many varieties available.
While there’s no one-size-fits-all answer, there are a few guidelines to help you navigate your options.
First, consider the roast profile.
Espresso beans are traditionally darker roasts, which contribute to the rich, bold flavors we associate with espresso.
However, don’t be afraid to experiment with medium roasts if you prefer a lighter, more nuanced flavor profile.
Next, think about the origin of the beans.
Single-origin beans come from one location and can offer unique flavor notes ranging from fruity to floral to earthy.
Conversely, blends combine beans from various origins to create a balanced, complex flavor profile.
Both can produce excellent espresso, so let your taste buds guide you.
Grinding Coffee Beans to the Perfect Consistency
Grinding your beans just before brewing is crucial for capturing the freshest flavors.
The grind consistency for espresso is finer than that for drip coffee, resembling fine sand.
This fine grind is essential for the short, intense extraction process of making espresso, allowing water to evenly saturate and extract the flavors from the grounds.
Investing in a quality burr grinder is a wise choice for any espresso enthusiast.
Burr grinders provide a consistent grind size, which is vital for even extraction.
If the grind is too coarse, the water will flow through too quickly, resulting in a weak, under-extracted shot.
Too fine, and the water will struggle to pass through, leading to over-extraction and bitterness.
Finding the perfect grind size might require some experimentation.
Start with the recommended setting for espresso on your grinder and adjust based on the taste of your shots.
A balanced espresso should be rich and complex, with a harmonious blend of sweet, acidic, and bitter notes.
Step #3: Filling the Portafilter
With your espresso machine warmed up and your coffee beans freshly ground to the perfect consistency, the next step in your espresso journey is to fill the portafilter.
This stage is where precision meets artistry, setting the stage for the espresso extraction process.
Let’s explore how to properly dose and tamp your coffee grounds for the ultimate espresso shot.
How to Properly Dose and Tamp the Coffee Grounds
Dosing
The dose refers to the amount of coffee grounds you use for your shot, and it’s a critical factor in achieving the right balance in your espresso.
For a standard double shot, aim for about 18 to 20 grams of coffee.
This can vary slightly depending on your machine and preferences, but it’s a good starting point.
Use a digital scale for accuracy, as even a small deviation can significantly impact the taste of your espresso.
Once you’ve measured the right amount, evenly distribute the grounds into the portafilter.
A common technique is to gently tap the sides of the portafilter to settle the grounds before tamping.
This helps prevent air pockets and ensures a more uniform distribution.
Tamping
Tamping compresses the coffee grounds, creating a flat and even surface that water can evenly penetrate during extraction.
Hold the tamper like you would a doorknob, with a straight wrist, and apply firm, even pressure.
The goal is not to tamp as hard as you can but to be consistent.
A pressure of about 30 pounds is often recommended, but what’s more important is that you use the same pressure every time you tamp.
After tamping, the surface of the coffee should be smooth and level.
If you see any cracks or unevenness, it’s worth redoing the tamp to avoid channeling, where water bypasses the coffee, leading to under-extraction.
Ensuring Even Distribution and Compaction
Even distribution of the coffee grounds in the portafilter is crucial for optimal extraction.
Uneven grounds can lead to water finding the path of least resistance, resulting in some coffee being over-extracted while other parts are under-extracted.
After filling the portafilter, give it a gentle shake or use a distribution tool to level the grounds before tamping.
This step ensures that the water will evenly extract the coffee, leading to a more balanced and flavorful espresso.
Compaction is equally important.
A well-tamped shot prevents water from channeling through the coffee too quickly.
It should take about 25 to 30 seconds for a standard double shot to extract once you start your espresso machine.
If your espresso pours too quickly, consider a finer grind or a firmer tamp.
If it pours too slowly, adjust in the opposite direction.
Step #4: Pulling the Perfect Shot
Now that your portafilter is filled with precisely dosed and evenly tamped coffee, you’re at the thrilling moment of pulling the perfect shot.
This stage is where your preparation meets the machine’s capabilities to create espresso magic.
Let’s walk through the steps to lock in the portafilter, start the extraction, and ensure your shot is of the highest quality.
Steps to Lock in the Portafilter and Start the Extraction
Locking in the Portafilter
With your portafilter filled and ready, align it with the group head on your espresso machine.
Gently insert the portafilter and rotate it until it’s securely locked in place.
This step is crucial for creating a tight seal that ensures water flows evenly through the coffee grounds under high pressure.
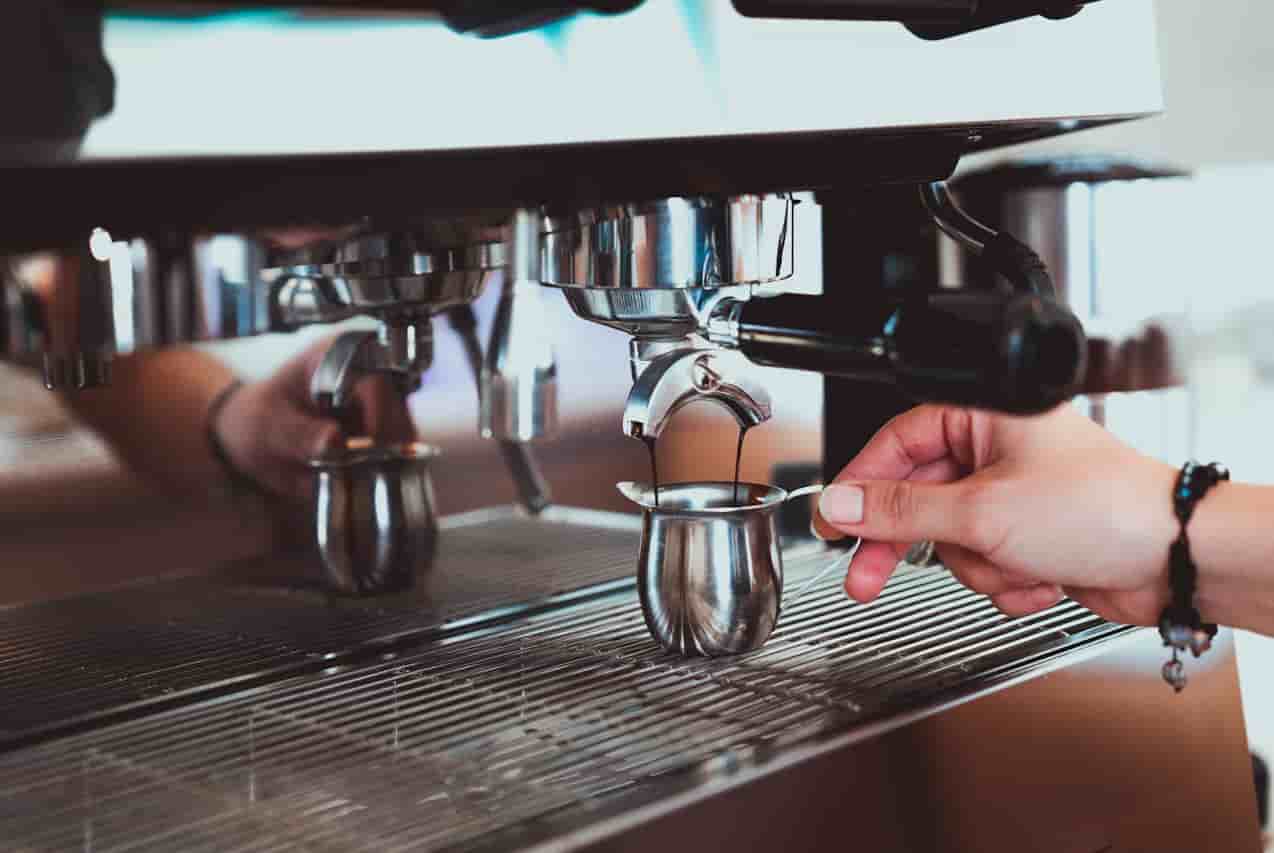
Starting the Extraction
Once the portafilter is locked in, it’s time to start the extraction.
Depending on your espresso machine, this might involve pressing a button or flipping a switch.
As soon as you initiate the extraction, pay close attention to the flow of the espresso and the timing.
How to Monitor the Shot for Quality and Timing
Monitoring the Flow
The ideal espresso shot will start with a few drips before transitioning into a steady, honey-like stream.
The color should be a rich, caramel brown, indicating that the extraction is pulling out all the flavorful oils and compounds from the coffee.
Timing the Shot
Timing is critical in espresso extraction.
A standard double shot should take about 25 to 30 seconds from the moment you start the extraction.
Use a timer to help you keep track, and watch the shot closely as it progresses.
If the shot runs too quickly or too slowly, it can indicate issues with your grind size, tamping pressure, or dose.
Troubleshooting Common Issues
Sour Shots
A sour shot is often a sign of under-extraction, meaning the water hasn’t had enough time to pull out the coffee’s rich flavors.
This can be due to a coarse grind, too little coffee, or too quick of an extraction.
To remedy this, try a finer grind, increase your dose, or aim for a longer extraction time.
Bitter Shots
Bitterness is usually a symptom of over-extraction, where the water has pulled out too many bitter compounds from the coffee.
This could be the result of a grind that’s too fine, too much coffee, or an extraction that’s too long.
Adjust by coarsening your grind, reducing your dose, or shortening the extraction time.
Uneven Extraction
If your espresso is coming out unevenly from the portafilter spouts or has blonding (light-colored streaks) early in the shot, it might indicate uneven distribution or tamping.
Make sure to distribute the grounds evenly in the portafilter and tamp with consistent pressure to avoid these issues.
Step #5: Steaming and Frothing Milk
After mastering the art of pulling the perfect shot, the next step in your espresso journey is to learn the craft of steaming and frothing milk.
This process transforms your espresso into a wide array of delicious, creamy coffee drinks.
Achieving the perfect texture and temperature for your milk is essential for creating that silky smooth latte or cappuccino that rivals your favorite café.
Techniques for Steaming Milk to Achieve the Perfect Texture and Temperature
Preparing Your Milk
Start with cold milk, and fill your steaming pitcher about halfway or just below the spout’s bottom.
This allows enough room for the milk to expand without overflowing.
Whole milk is often preferred for its richness, but alternative kinds of milk can also produce great results with a bit of practice.
Positioning the Steam Wand
Submerge the tip of the steam wand just below the surface of the milk, off to one side of the pitcher.
This positioning is crucial for creating a whirlpool effect, which evenly heats the milk and incorporates air for that desirable microfoam.
Steaming the Milk
Turn on the steam wand to its full power.
You’ll hear a hissing sound as air is introduced into the milk, creating foam.
Keep the tip of the wand just below the surface to continue adding air until the milk reaches about 100°F (38°C).
Then, submerge the wand deeper into the milk to continue heating without adding more air.
The ideal final temperature for steamed milk is around 140°F to 150°F (60°C to 65°C), where it’s hot to the touch but not scalding.
Tips for Creating Microfoam for Latte Art
Creating the Perfect Microfoam
The key to velvety microfoam is introducing just the right amount of air and integrating it fully into the milk.
Aim for a paper-tearing sound when first starting to steam; this indicates that air is being correctly incorporated.
Once you’ve reached the desired amount of foam, submerge the wand to heat the milk evenly.
Achieving a Silky Texture
Consistent swirling and tapping can help eliminate large bubbles, creating a smooth, glossy microfoam that’s ideal for latte art.
After steaming, gently tap the pitcher against the counter and swirl the milk to break any large bubbles and to make the texture as uniform as possible.
Practicing Your Pour
Pouring the milk is just as important as steaming it when it comes to latte art.
Start by pouring from a height to integrate the espresso and milk, then bring the pitcher closer to the surface as you pour more steadily.
This allows the microfoam to flow out and create patterns on the surface of your drink.
Step #6: Cleaning and Maintenance
A crucial, yet often overlooked, aspect of creating the perfect espresso at home is the cleaning and maintenance of your espresso machine.
Regular upkeep not only ensures the longevity of your machine but also the quality and taste of your espresso shots.
Let’s explore the essential daily cleaning routines and delve into the deeper maintenance tasks like descaling and decalcifying that will keep your machine running smoothly.
Daily Cleaning Routines to Keep Your Machine in Top Condition
After Each Use
It’s vital to start with the basics.
After each use, remove the portafilter and knock out the used coffee grounds into a knock box.
Rinse the portafilter and the basket under hot water to remove any remaining coffee residue.
This prevents old grounds from imparting bitter flavors to your next shot.
Steam Wand Care
Milk can quickly build up on and inside the steam wand, leading to clogs and affecting the taste of steamed milk.
After every use, wipe down the steam wand with a damp cloth and purge it by releasing steam for a few seconds.
This blasts out any milk residue inside the wand.
Group Head Cleaning
The group head should also receive daily attention.
Use a group head brush to clean around the seal and remove any coffee oils and grounds.
Additionally, running a water cycle without the portafilter in place helps to rinse out any leftover coffee particles.
Surface Wipe-Down
Finally, keep the exterior of your machine clean by wiping it down with a damp cloth.
This not only keeps your machine looking great but also prevents any coffee or milk spills from becoming sticky and attracting ants or other pests.
Describing and Decalcifying the Machine for Long-Term Maintenance
Descaling
Over time, water can leave mineral deposits inside your machine, which can affect its performance and the taste of your coffee.
Descaling is the process of removing these deposits.
The frequency of descaling depends on the hardness of your water and how often you use your machine, but generally, it should be done every 2-3 months.
Use a descaling solution recommended by your machine’s manufacturer, and follow the instructions carefully.
This usually involves running the solution through the machine’s water system and then flushing it thoroughly with fresh water.
Decalcifying
Similar to descaling, decalcifying focuses on removing calcium deposits specifically.
Hard water areas are particularly prone to causing calcification within espresso machines.
Some machines have built-in indicators to alert you when decalcification is needed, while for others, it’s a good practice to decalcify at regular intervals, similar to descaling.
Deep Cleaning
Beyond daily maintenance and regular descaling, your machine may benefit from a professional deep clean or service, especially if you notice a decline in performance or consistent issues with shot quality.
This can involve taking apart certain components of the machine to clean it thoroughly and should ideally be done by a professional familiar with your model of espresso machine.
Advanced Tips and Tricks
Once you’ve mastered the basics of using your espresso machine, it’s time to dive into the more nuanced aspects of espresso brewing.
This is where your creativity and personal taste preferences really come into play.
Let’s explore some ways to elevate your home barista skills to the next level.
Experimenting with Different Beans and Grind Sizes
Bean Exploration
The type of coffee bean you use can dramatically change the flavor profile of your espresso.
Venture beyond your usual beans and try single-origin coffees from different regions or unique blends from local roasters.
Each bean will have its own characteristics, whether it’s fruity, floral, nutty, or chocolaty, allowing you to tailor your espresso to your mood or preference.
Grind Size Mastery
The grind size of your coffee is crucial in extracting the perfect shot.
A slight adjustment can make a significant difference.
If you’re feeling adventurous, experiment with slightly finer or coarser grinds than what you’re accustomed to.
Remember, a finer grind will slow down the extraction, potentially leading to a richer and more intense flavor, while a coarser grind will speed it up, possibly resulting in a lighter taste.
Keep a log of your experiments to track what works best for each type of bean.
Adjusting Brewing Parameters for Personal Taste Preferences
Temperature Tweaking
The brewing temperature can influence the extraction rate and the flavors extracted from your coffee.
Some espresso machines allow you to adjust the temperature.
Experimenting with slightly higher or lower temperatures can unveil new flavor notes in your coffee, making each cup a unique experience.
Pressure Profiling
If your machine has the capability, playing with the pressure during extraction can offer a new dimension to your espresso.
Starting with a lower pressure can help pre-infuse the coffee, leading to a more even extraction, while finishing with a higher pressure can enhance the body and crema of your espresso.
Introduction to Latte Art and Advanced Brewing Techniques
Latte Art Basics
Latte art is not just for show; it’s a sign of well-steamed milk that’s perfectly integrated with the espresso.
Start with simple designs like a heart or a rosetta.
The key is in the pour – control the flow of milk to create your design, using the microfoam you’ve perfected.
There are plenty of tutorials available that can guide you through the process, step by step.
Advanced Brewing Techniques
As you become more comfortable with your espresso machine, you might want to explore advanced brewing techniques like over-extraction and under-extraction to see how they affect the taste.
You can also experiment with different ratios of coffee to water, or even try making ristrettos (a shorter, more concentrated espresso) and lungos (a longer, more diluted espresso) to see how they compare to your standard espresso shot.
Conclusion
Embarking on the journey of home espresso making is both an art and a science, where each step, from warming up your machine to pulling the perfect shot and mastering milk texture, plays a crucial role in crafting that ideal cup.
We’ve explored the nuances of selecting beans, the precision in grinding, the artistry in tamping, and the finesse required in extraction and milk steaming.
These steps are the foundation upon which great espresso is built.
But remember, the true joy of espresso-making lies in the experimentation and the personal touch you bring to each cup.
Don’t shy away from trying new beans, adjusting your grind, or playing with brewing parameters.
Each variation opens up a new spectrum of flavors and experiences.
Making espresso at home is a journey of discovery, one that allows you to savor not just the coffee but the process itself.
FAQ’s
How do you make regular coffee with an espresso machine?
To make regular coffee with an espresso machine, you can pull a long shot (lungo) or an Americano, which involves adding hot water to a shot of espresso.
Start by pulling a standard espresso shot, then add hot water to dilute it to the strength of regular coffee.
Is it hard to use an espresso machine?
Using an espresso machine can seem daunting at first due to the various steps involved.
However, with practice and patience, it becomes an enjoyable and rewarding process.
Start with understanding the basics and gradually experiment with different settings to find what works best for you.
Is coffee just watered-down espresso?
Not exactly.
While an Americano is made by adding hot water to espresso, resulting in a coffee-like strength, the brewing methods for regular coffee and espresso are different.
Espresso is made under pressure, which extracts rich flavors and creates a distinct crema on top.
Is espresso stronger than coffee?
Yes, espresso is stronger than regular coffee in terms of flavor concentration and caffeine content per ounce.
However, because espresso servings are smaller, a standard cup of coffee may contain more caffeine overall.
What coffee do I use for an espresso machine?
For an espresso machine, it’s best to use coffee beans labeled as “espresso” or beans of a dark roast.
However, you can use any coffee bean you prefer; just ensure it’s freshly ground to a fine consistency right before brewing for the best flavor.
How do I make a single shot of espresso?
To make a single shot of espresso, dose about 7-9 grams of finely ground coffee into your portafilter, tamp it evenly, and lock the portafilter into your espresso machine.
Brew for about 25-30 seconds or until you get about 1 ounce (30 ml) of espresso.
Can I make Espresso without an espresso machine?
While traditional espresso requires pressure that’s usually provided by an espresso machine, you can make a strong, concentrated coffee similar to espresso using a Moka pot, Aeropress, or French press with a fine grind and proper technique.
Is Decaf espresso any good?
Yes, decaf espresso can be just as delicious as regular espresso, depending on the quality of the beans and the decaffeination process.
Look for decaf espresso beans that have been water-processed to maintain their flavor profile.
How do you make a cappuccino with an espresso machine?
To make a cappuccino, start by brewing a single or double shot of espresso into a cup.
Steam milk to about 150°F (65°C) until it’s frothy and has doubled in volume.
Pour the steamed milk over the espresso, aiming for a 1:1:1 ratio of espresso, steamed milk, and milk foam.